Digital badges can provide a way for instructors to recognize students’ achievements beyond simple grades. Additionally, they provide a verified way for students to share their accomplishments with potential employers and others.
This article covers adding badges to your Scholar course.
Scholar has a built-in Achievements tool that allows instructors to award badges to students for the completion of certain course goals. Achievements can be manually awarded or tied to specific actions in the course. Students can then export their in-course badges to the Mozilla Open Backpack to share with others.
Adding the Achievements Tool
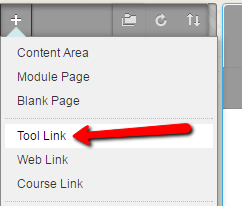
In order for students to view the badges that they’ve been awarded, you’ll have to add a link to the Achievements tool to your course. Click the plus sign at the top of the course menu and choose Tool Link.
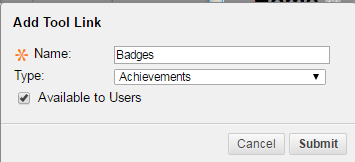
Give the link a name, and select Achievements from the Type menu. So that students can see their badges, make sure to check the Available to Users box.
You’re then ready to define badges.
Setting up Badges
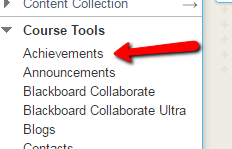
To set up badges for your course, first go to the Achievements tool under Course Tools.
To create a badge, select Milestone from the Create Achievement menu.

At the very top of the course, type the name of the achievement/badge.

Achievements must reside in one of the content areas of your course. Potential locations are in a special area of their own, or in the same content area as the item that triggers the issuance of the badge.
To set the location of the Achievement, click the Browse button under Achievement Location.
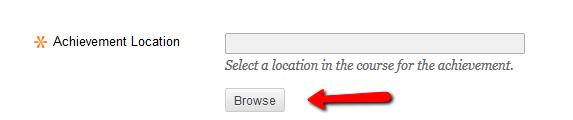
In the window that comes up, select the location and click it.

You can then select whether students can see the badge before they are awarded it, and enter a description for the badge.

Once you’ve completed those sections, click Define Triggers.
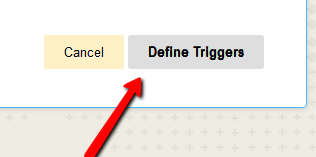
You’ll be brought to a screen where you can define what will trigger the badge.
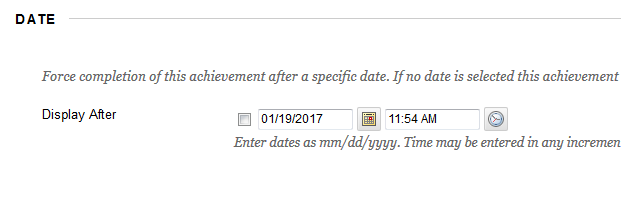
The Date section allows you to only award the badge after a certain date.
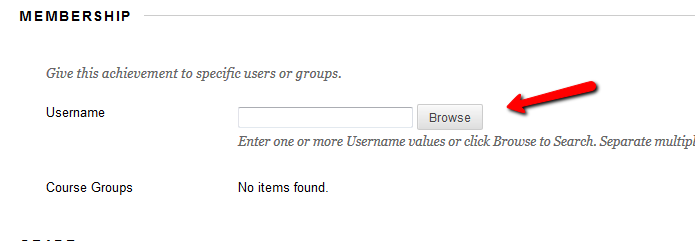
Membership allows you to manually issue a badge. Click Browse to find the usernames of the students to whom you wish to award the badge. Do not use this badge if you want the badge to be automatically issued after the student(s) complete coursework.
The Grade section allows you to automatically issue a badge when the students complete an assignment or test. To use it, first select the assignment/test that you want to trigger the badge issuance in the Select a Grade Center Column dropdown.
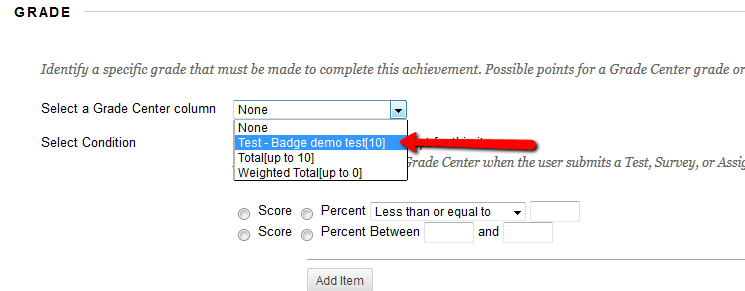
Then, choose the condition that you want to use:
“User has at least one attempt for this item” will issue the badge as soon as the student submits the test or assignment, regardless of thier grade
The next one allows you to set a single condition, such as a grade being less than, equal to or greater than a particular score.
The bottom one allows you to define a range of scores or percentages.
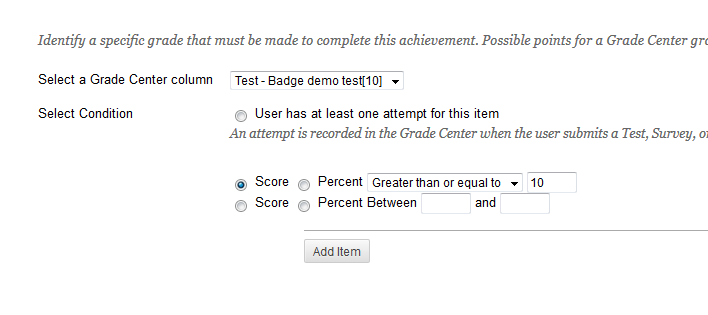
If you want the student to have to do multiple assignments to earn the badge, click Add Item.

The final section of this screen, Review Status, issues the badge when students click a button saying that they’ve read a particular assignment. NOTE: They do not have to actually read the item to trigger this.
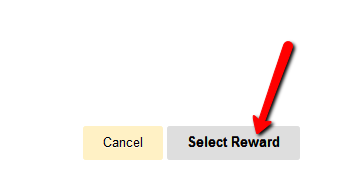
When you’re done setting up the rule, click Select Reward.
Finally, you’ll be taken to the Reward screen. On the top section, you can change the name of the issuer (it’s Christopher Newport University by default), and set an expiration for the badge.

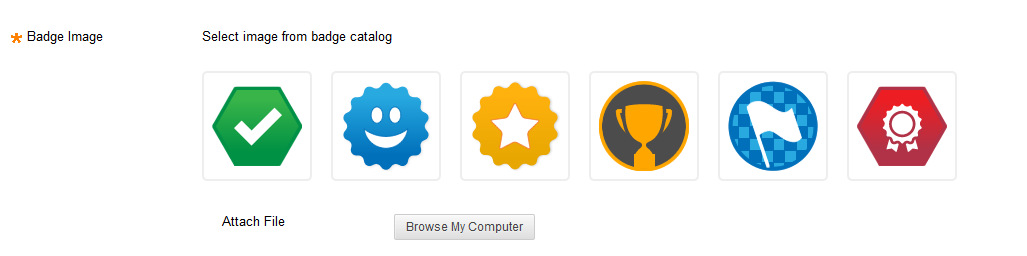
Next, scroll down and you can choose the design of the badge. If you’ve designed your own badge, you can upload it by clicking Browse My Computer.
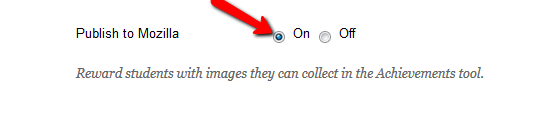
Finally, if you want the students to be able to publish their badges to the Mozilla Open Backpack in order to share them with employers, other schools, or other interested people, click On next to Publish to Mozilla.
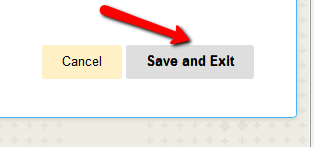
Click Save and Exit, and your badge will be created.