Windows
CNU provides both online and desktop versions of Office 365 for students, faculty and staff. This allows you to use Microsoft Office from any computer with an internet connection, or to download and install Microsoft Office on up to 5 computers.
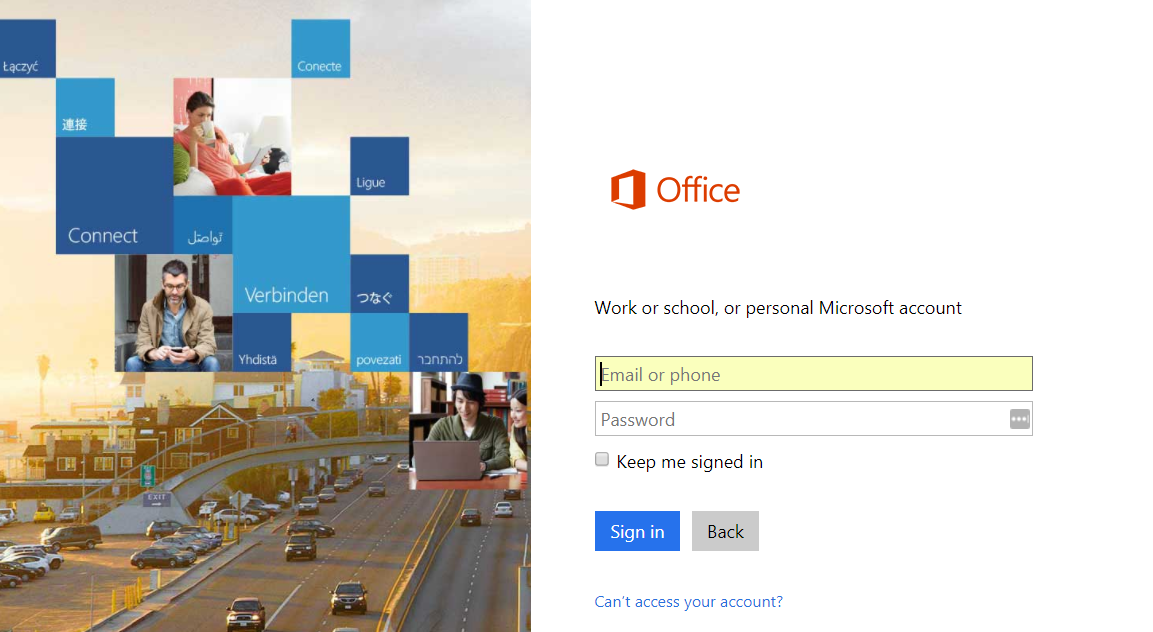
To install Office 365 on a Windows computer, select "Office 365" from the My Links area on my.cnu.edu.

You will see a field labeled “Get Office 365 for free”. Complete this field with your CNU email address and click the button that says “Get started”.

You will be brought to a window asking you whether you are a student or a teacher. Select the option that is relevant to you (staff can click “I’m a teacher”).

If you’ve logged into Office 365 with your CNU credentials before, a window should change to confirm that you have an existing Office365 account under those credentials. Select “Sign in” and sign in using the resulting screen.


you may see an additional confirmation that your account includes licensure for Office 365 Education. Select “Ok, got it” to continue.

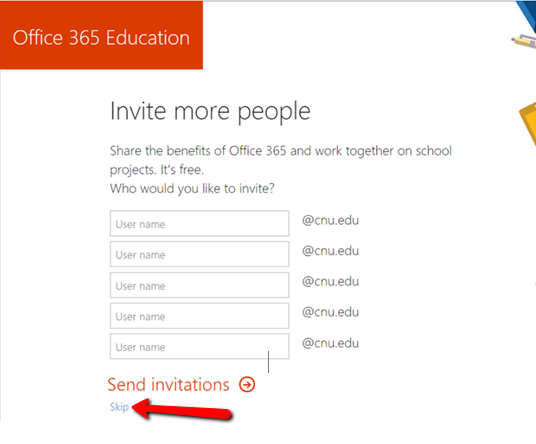
If you have never logged in at Office 365 before, you’ll see a screen that says “Almost there” After logging in. Select “Start”, and you should see a window that allows you to invite additional people with CNU credentials to join (This part can be easily skipped by clicking ‘Skip’.)


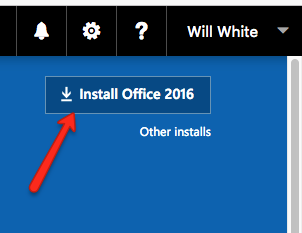
You should now be on the main page of Office 365. Click on “Install Office 2016” to install MS Office on your computer.

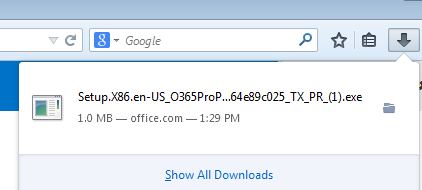
The setup program will download to your computer. On Firefox , you’ll have to choose to save the file.

Click on the download and choose to run the file.
Chrome:

Firefox:
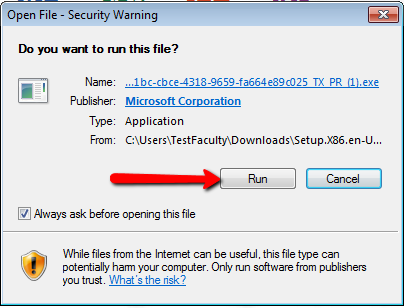
If you get a security warning, click “Run”.
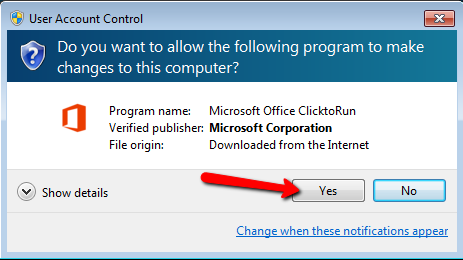
You may also have to allow the program to make changes to your computer. (Note: if you are adding this software to a computer provided by the university, you may need to contact someone with administrative permissions to clear this step. If you are using your own home computer, this will not be the case.)
On the next screen, click “Next”

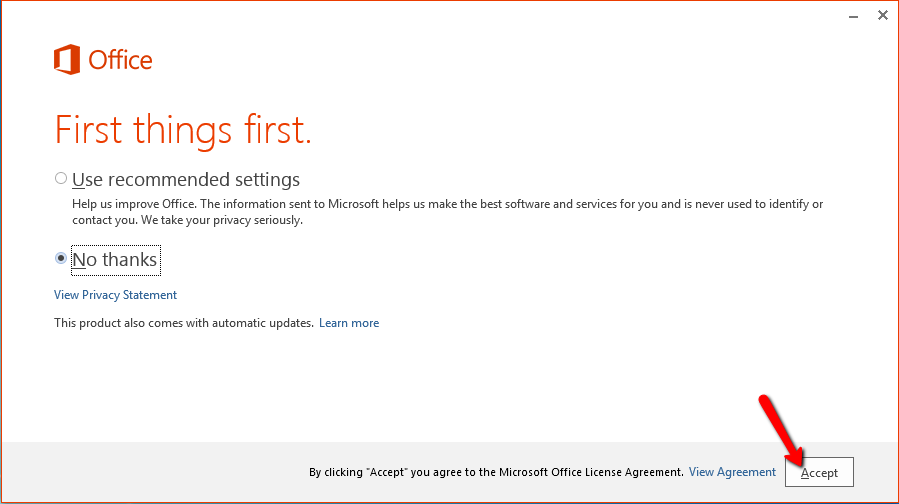
On the following screen, if you want to share data on your usage of Office with Microsoft, choose “Use recommended settings”. If you don’t, choose, “No thanks.”.Then, click Accept.
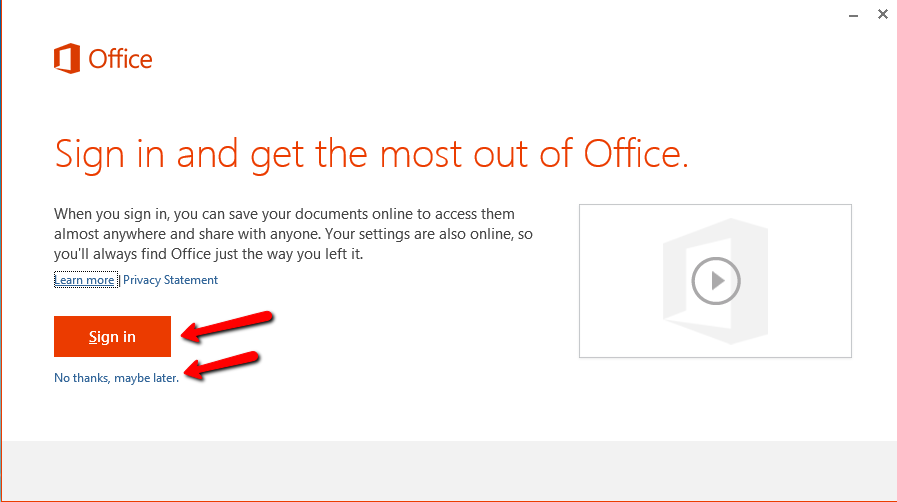
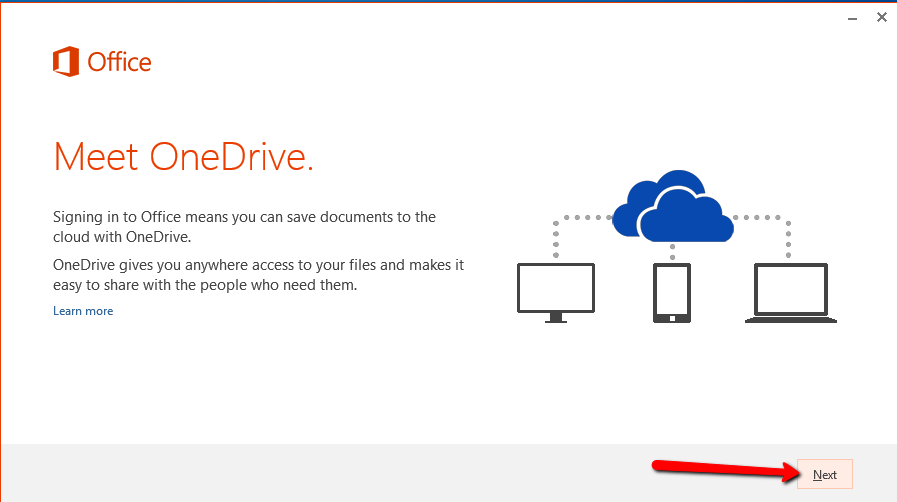
You can save your documents online and save your settings by signing in to your CNU account. To do so, click “Sign in” on the next screen. If you don’t want to, click “No thanks, maybe later”.
If you choose to sign in, you should enter your CNU e-mail address in the box that pops up.

Enter your password in the next box.

Click “Next” on the next screen.
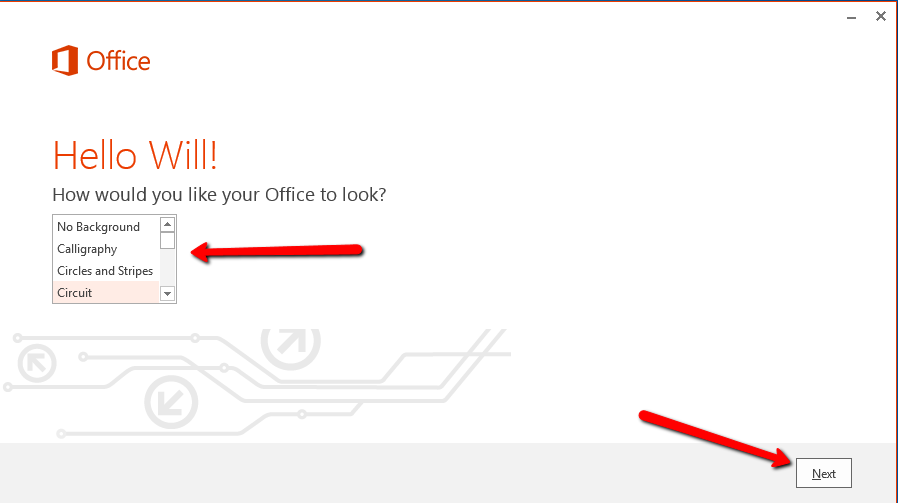
On the next screen, choose a background for your Office install, and click next.
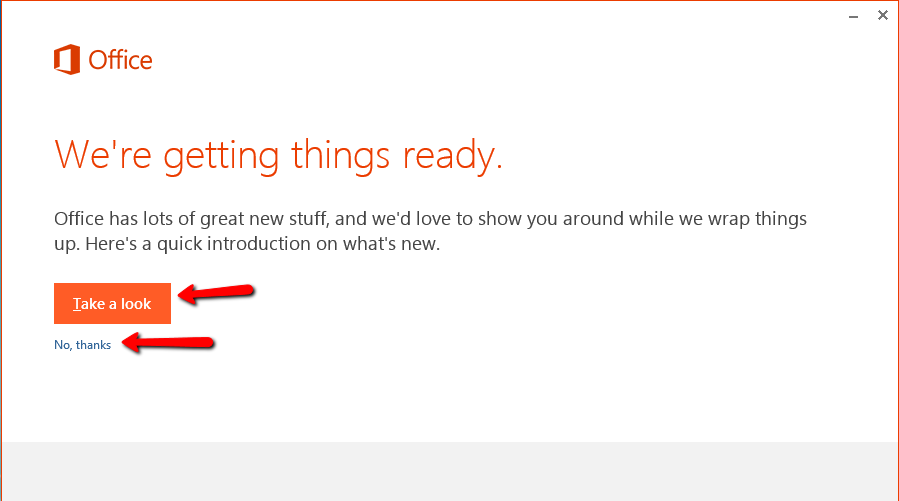
On the following screen, you can get a tour of the features of Office 365. To view the tour, click “Take a Look”. If you don’t want the tour, click “No, thanks.”
While you’re making these choices, Office will be installed. You’ll be notified when the installation is complete.
Macs
To install Office 365 on a Mac, select "Office 365" from the My Links area on my.cnu.edu.
You will see a field labeled “Get Office 365 for free”. Complete this field with your CNU email address and click the button that says “Get started”.

You will be brought to a window asking you whether you are a student or a teacher. Select the option that is relevant to you (staff can click “I’m a teacher”).

If you’ve logged in to Office 365 with your CNU credentials before, a window should change to confirm that you have an existing Office365 account under those credentials. Select “Sign in” and sign in using the resulting screen.

you may see an additional confirmation that your account includes licensure for Office 365 Education. Select “Ok, got it” to continue.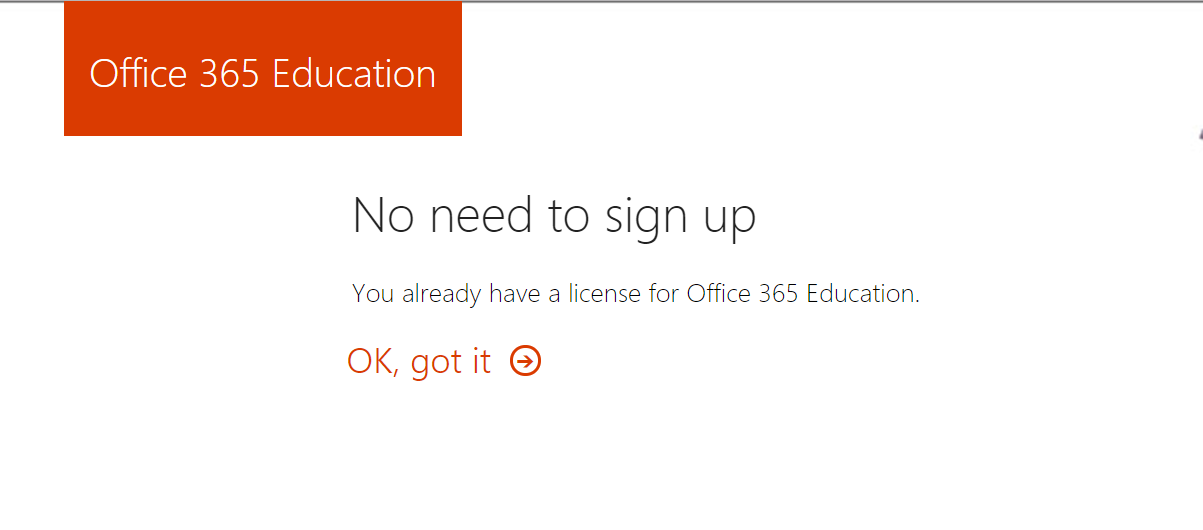
If you have never logged in at Office 365 before, you’ll see a screen that says “Almost there” After logging in. Select “Start”, and you should see a window that allows you to invite additional people with CNU credentials to join (This part can be easily skipped by clicking ‘Skip’.)

You should now be on the main page of Office 365. Click on “Install Office 2016” to install MS Office on your computer.
The setup program will download to your computer. From the Downloads icon on your dock, choose Microsoft_Office_2016_<some numbers>_Installer.pkg

The installer will launch. On the first two screens, click “Continue”,

You’ll be asked to accept the license agreement; click “Agree”.

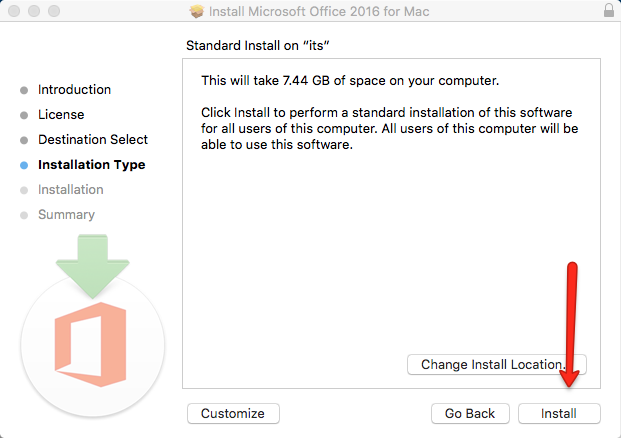
You’ll be asked for whom you’d like to install the software. Choose “Install for all users of this computer” and click Continue.

Then, click Install.
The install will begin. When the install completes, click “Close”.

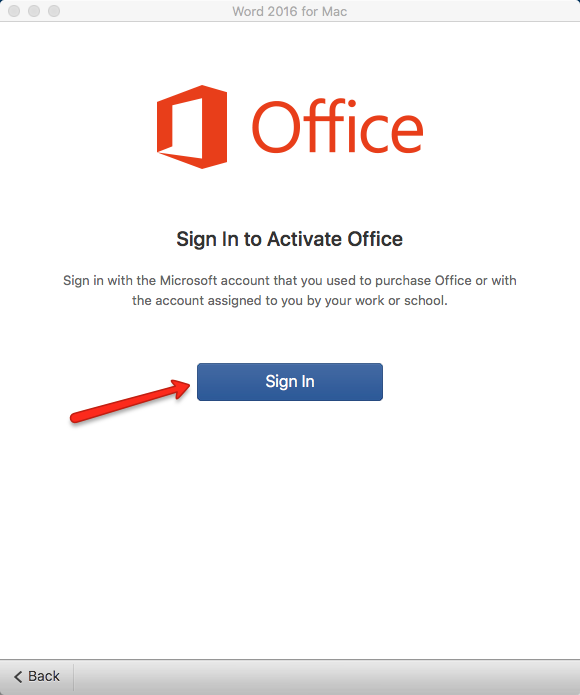
Next, launch Word, Excel or PowerPoint. On the first screen, click Get Started.

Then, click the Sign In button.
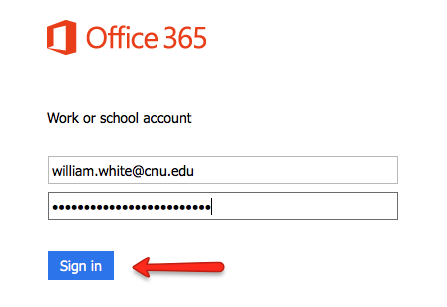
Enter your CNU e-mail address and click Next.

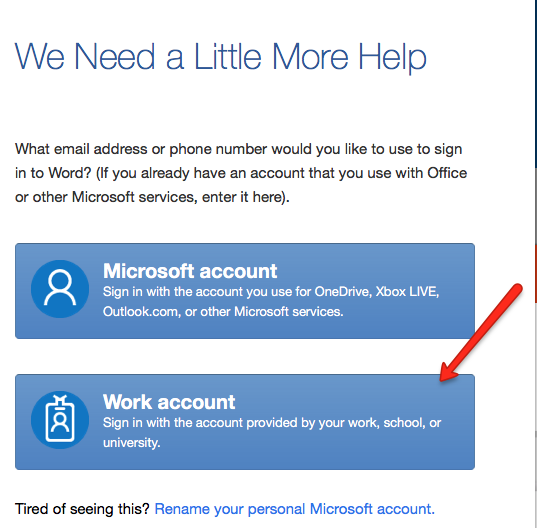
You may be asked whether you’d like to sign in to a Microsoft account or your Work account. Choose Work account.
On the next screen, enter your CNU password and click Sign In
After a brief delay, Office will be ready to use.