|
The two tools supported by CNU for group file storage are Team Drives and the Collaborative area on Galileo, also known as the Z drive on Windows machines. The table below will give you an idea of the differences between the two
Team Drive | Galileo | |
File types allowed | All file types and Google documents | All file types |
New top level folders/drives created by | Any CNU user | ITS |
Access managed by | Those given Full Access on the team drive | ITS |
Off-campus Accessible | Yes | Only with VPN |
File location | Google Datacenters | On campus |
Access files directly on your computer? | No | Yes, automatically on Windows, manually on Mac |
Access files through web browser? | Yes | No |
Files sharable with external users? | Yes | No |
Creating a Shared Drive is simple. Log in to your Google Drive, and click the Shared Drives button.

With Shared Drives highlighted, click the New button.

A box will pop up asking you to name your drive. Type the name and click Create.

After a brief wait, you’ll be taken to your Shared drive.
To add users to your Shared Drive, click the Manage Members button at the top of the drive.

A box will pop up allowing you to add people to the drive. Begin typing their name or e-mail address on the top.

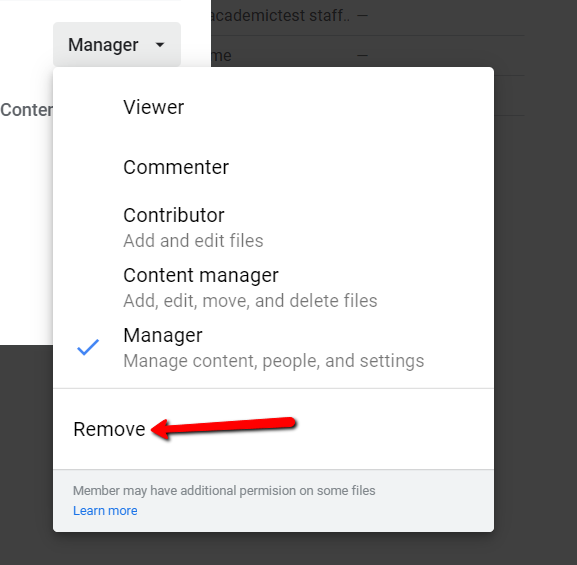
The box below the names gives you choices on how much access to give the person.
Your choices are:
Manager: Has all the access that the original creator has. This person can upload, edit, and delete files, as well as add and remove people’s access to the drive.
Contributer: This person can upload and edit files, but can’t move or delete them. They also can’t add or remove people from the drive.
Content Manager : Can upload, edit, move, and delete files, but cannot add or remove people from the drive.
Commenter: This person can add comments to Google documents and view files, but can’t make any changes.
Viewer: This person can view and download files, but can’t make any changes to the ones on the drive.
You can then enter a message explaining that you’ve added them to the drive. When you’re done, click Send and the person will be added to the drive. They will receive an e-mail letting them know they’ve been added.
If one of the people on the Shared Drive leaves CNU, they will lose access to their Google account, and thereby the Team Drive. However, if they still have a CNU Google account, they will need to be removed from the Team Drive by someone with Full access.
To do so, click on the name of the Team Drive and choose Manage Members.

You can then click on the dropdown next to the person whose access you would like to change. To remove them, choose Remove member from the list.

Click Done when you’re finished.
The Shared Drive functions just like a regular Google Drive. See the Google Drive documentation for more information on uploading and managing files within your Share Drive.