Windows Computers
Requesting VPN Access
The first step is to request VPN access using the attached form. Fill out the form and get your supervisor to sign it. Make sure “Remote Access to Desktop” is checked. Then, have your supervisor forward the form to the CIO by fax at 594-7500 or by campus mail at 121 Ratcliffe. Once VPN access is granted, you will have access to the VPN software, and you will have your desktop set up to allow incoming connections.
Setting up your Home Computer
You will need admin rights to your home computer to install the Global Protect product.
Launch your web browser and type https://gpvpn.cnu.edu into the address bar.
Whichever browser you use, you will then see the following screen. Enter your CNU username in the “name” box, then your password in the Password box.

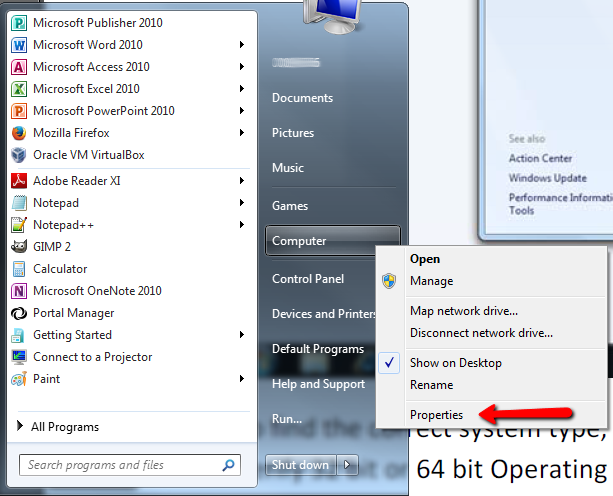
You’ll then be asked to download the version of Global Protect that matches your system. To tell your system type, click on the start menu, right-click on Computer, and choose Properties.

In the screen that appears, you can find your system type (64 or 32 bit):

Close that window, and download the file appropriate to your system type.
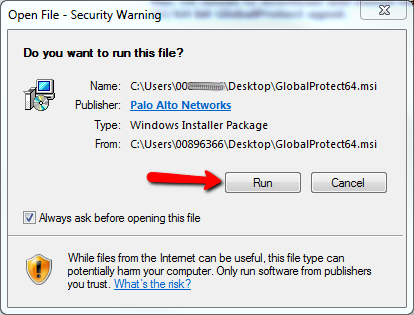
Double-click on the file to run it. A box will come up asking whether you want to run the file. Click “Run.”
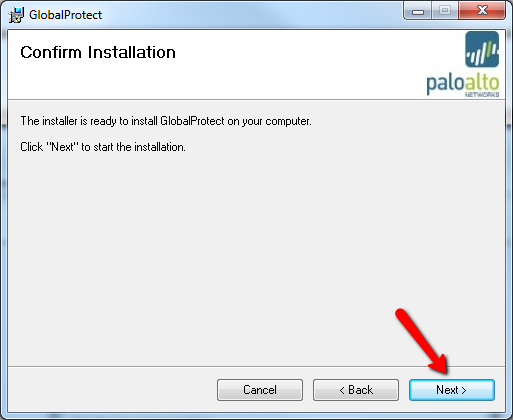
Click Next on the next three screens:


The program will be installed on your computer. Depending on your computer’s setup, you may have to enter your admin username and password. Click Complete when the client is done installing.
Preparing your Work Computer for Remote Connections
To be able to use the VPN to connect using these instructions, your computer will have to remain on campus and be turned on. You will also need to record your computer name.
To determine your computer’s name, click on the start menu, right-click on Computer, and choose “Properties”.

The window that comes up has your computer name in the spot indicated by the arrow below:

Write down the full computer name (ending with cnuadmin.cnu.edu) and take it home with you. You’ll need this information to connect to your computer later.
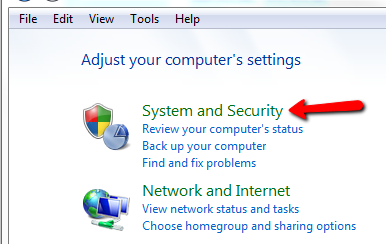
You will also have to ensure that your computer does not go to sleep. To do so, click on the Start menu and click on Control Panel.
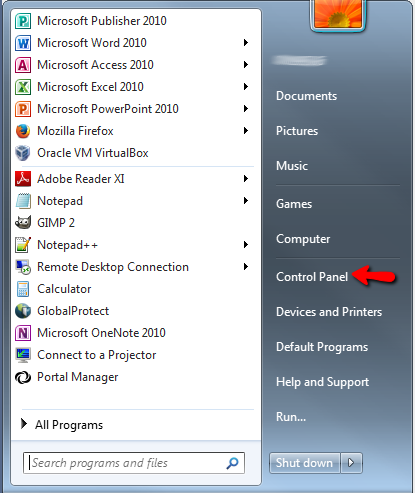
From the window that appears, click on “System and Security”.

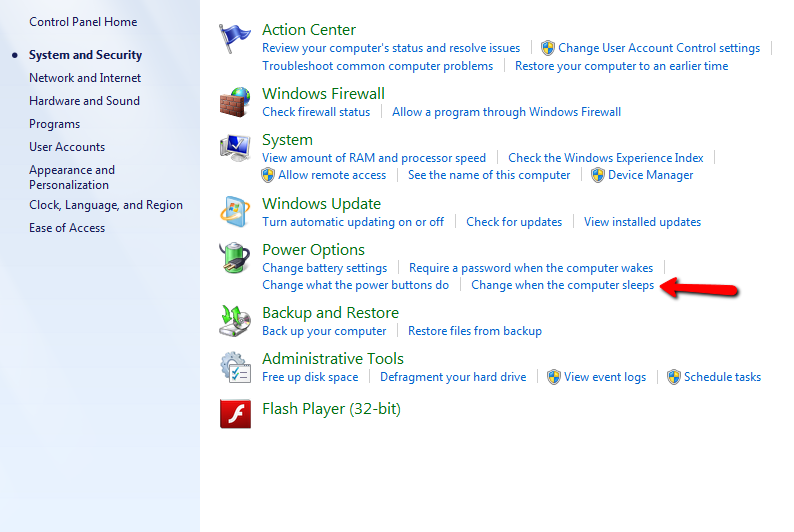
Then choose “Change when the computer sleeps”

You’ll see the window below pop up. Change the setting for “Put the computer to sleep” under “Plugged in” to Never and click “Save Changes”. If you don’t see that setting, you don’t need to do anything.

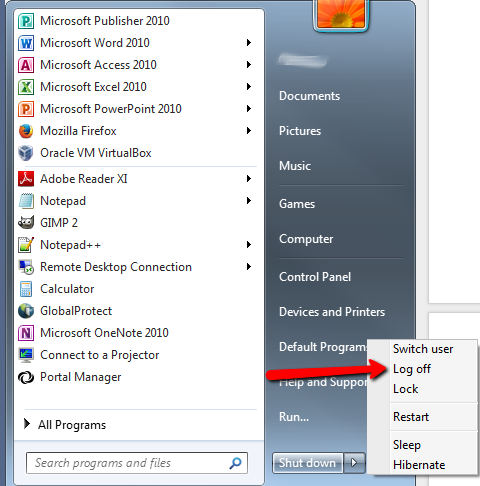
When you’re ready to leave for the day, make sure not to shut down your computer. Simply log out:

Connecting to your Computer via Remote Desktop (from your home computer)
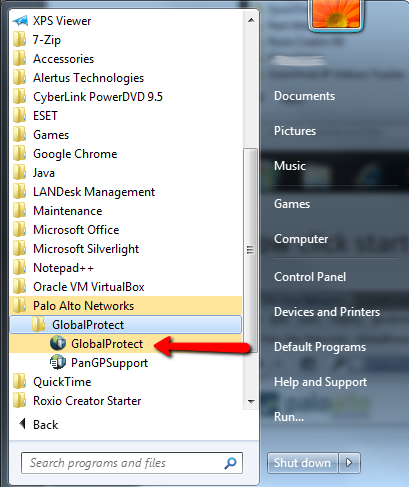
To access the client, click the start menu, click All Programs, and click on “GlobalProtect”:
Enter your CNU username and password into the appropriate boxes, and enter gpvpn.cnu.edu into the “Portal” box. Then click “Apply”
You will see this icon in the bottom-right corner of your screen if you are connected:

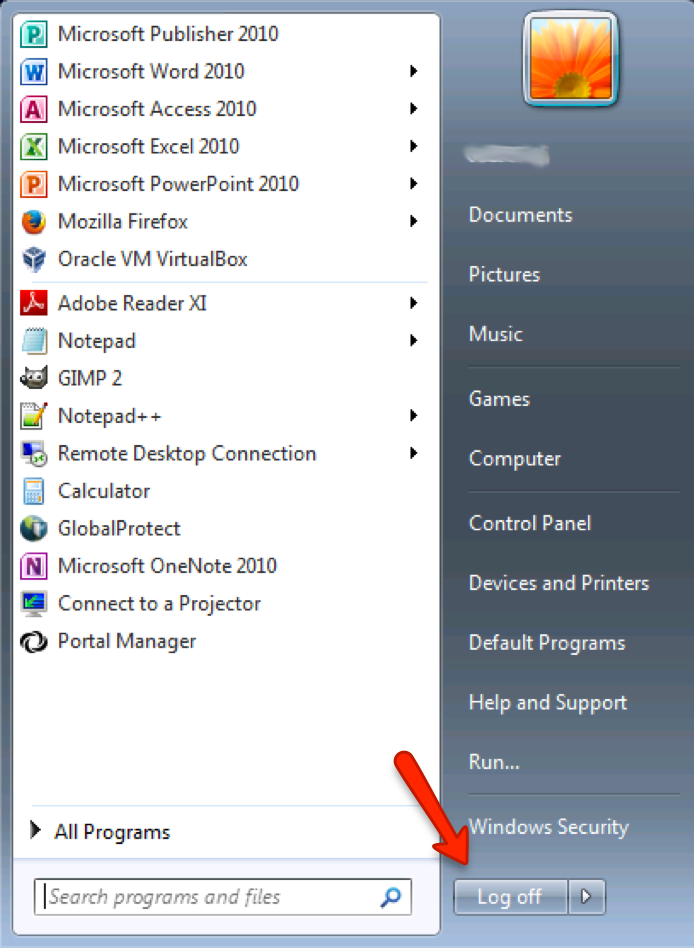
Once you are connected, click the start menu. Under All Programs, choose Accessories, and Remote Desktop Connection.

Enter the name of your computer in the box that pops up and click “Connect”

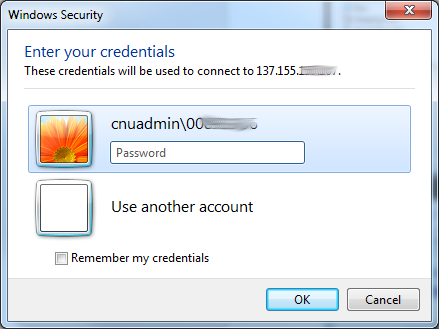
A window will pop up asking you for a password. If your correct CNU username appears in the box, enter your password. If not, click on “Use Another Account,” and enter cnuadmin\ and your username in the first box and your password in the second.
You will then be connected to your computer as if you were sitting at it in person.

When you’re done with your session, click the start menu, and then “Log Off”.

Mac Computers
Requesting VPN Access
The first step is to request VPN access using the attached form. Fill out the form and get your supervisor to sign it. Make sure “Remote Access to Desktop” is checked. Then, have your supervisor forward the form to the CIO by fax at 594-7500 or by campus mail at 121 Ratcliffe. Once VPN access is granted, you will have access to the VPN software, and you will have your desktop set up to allow incoming connections.
Preparing your Work Computer for Remote Connections
To be able to use the VPN to connect using these instructions, your computer will have to remain on campus and be turned on. You will also need to record your computer name.
To determine your computer’s name, click on the start menu, right-click on Computer, and choose “Properties”.
The window that comes up has your computer name in the spot indicated by the arrow below:

Write down the full computer name (ending with cnuadmin.cnu.edu) and take it home with you. You’ll need this information to connect to your computer later.
You will also have to ensure that your computer does not go to sleep. To do so, click on the Start menu and click on Control Panel.

From the window that appears, click on “System and Security”.
Then choose “Change when the computer sleeps”
You’ll see the window below pop up. Change the setting for “Put the computer to sleep” under “Plugged in” to Never and click “Save Changes”. If you don’t see that setting, you don’t need to do anything.

When you’re ready to leave for the day, make sure not to shut down your computer. Simply log out:
Setting up your Home Computer
Installing GlobalProtect
Before you can connect to your CNU computer on campus, you need to install the client software on your off-campus computer. To do so, navigate to https://gpvpn.cnu.edu .
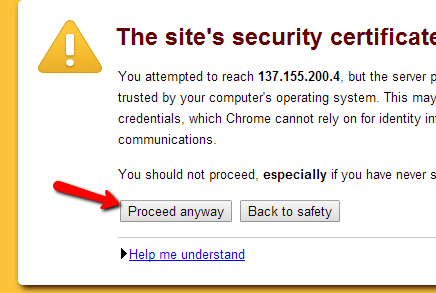
You will see a security exception. On Chrome, click “Proceed Anyway”.
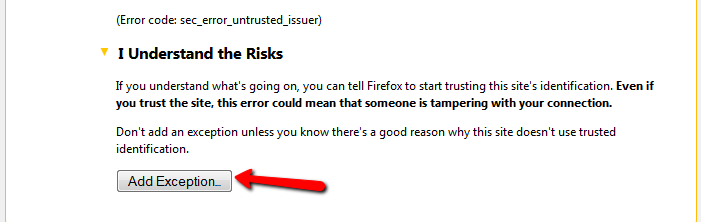
On Firefox, click “I Understand the Risks”, then “Add Exception”.
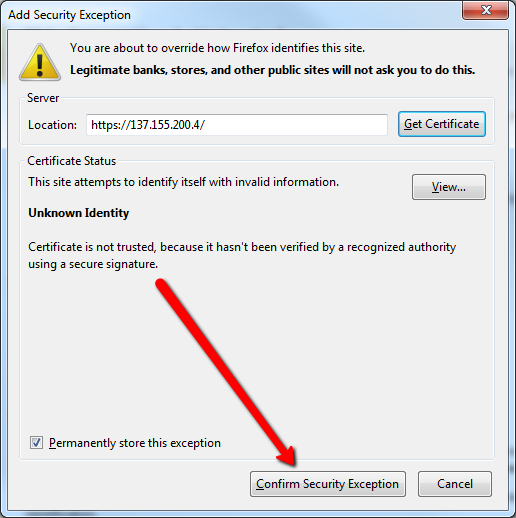
In the box that comes up, choose “Confirm Security Exception”.
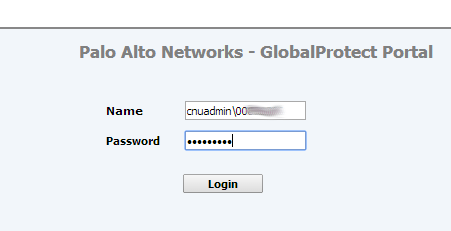
Whichever browser you use, you will then see the following screen. Enter cnuadmin\ followed by your CNU username in the “name” box, then your password in the Password box.
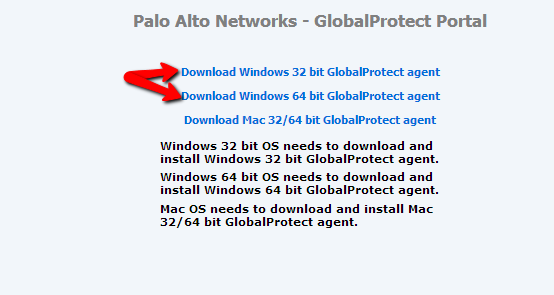
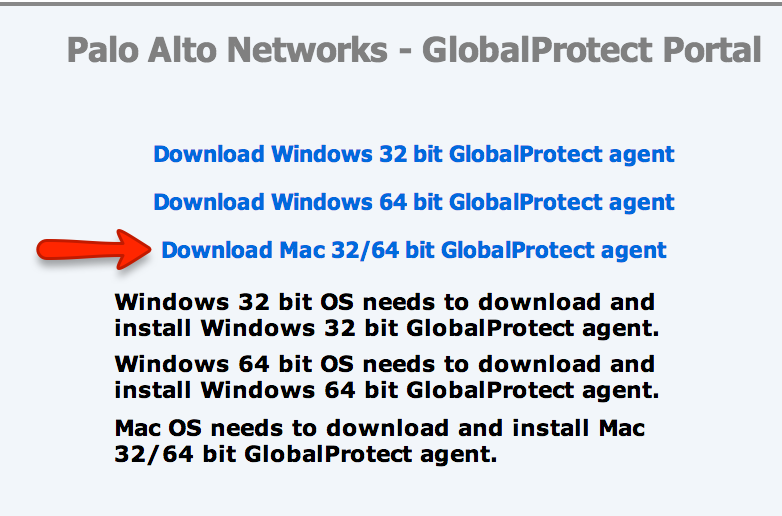
You’ll then be asked to download the version of Global Protect that matches your system. Download the Mac GlobalProtect agent.
If you use Chrome, you will be asked if you want to keep the file. You should click “Keep”.

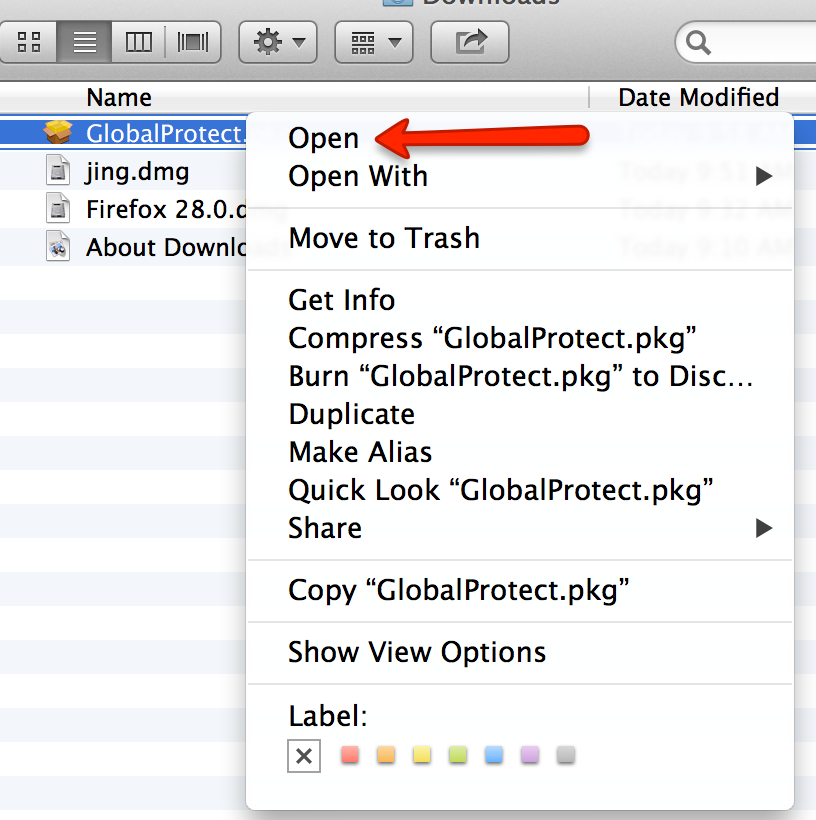
Navigate to your downloads folder, hold the [control] key, and click on the GlobalProtect.pkg file. Then, choose “Open.”
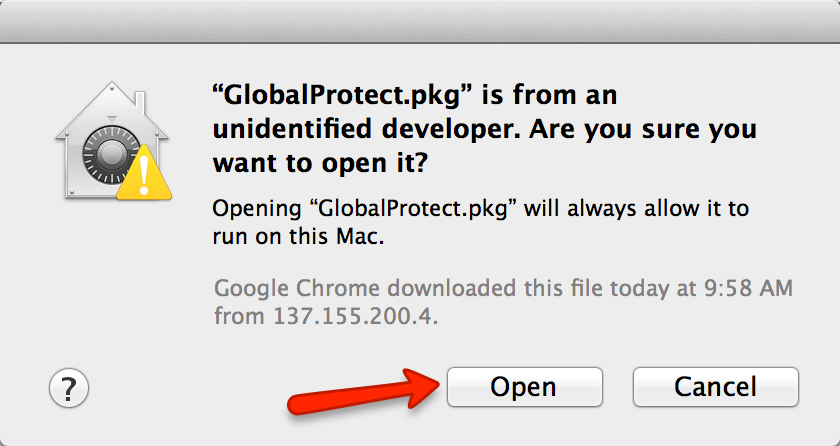
A warning will appear that the file is from an unknown developer. Click “Open” to install it.
The installer will then pop up. Click “Continue”

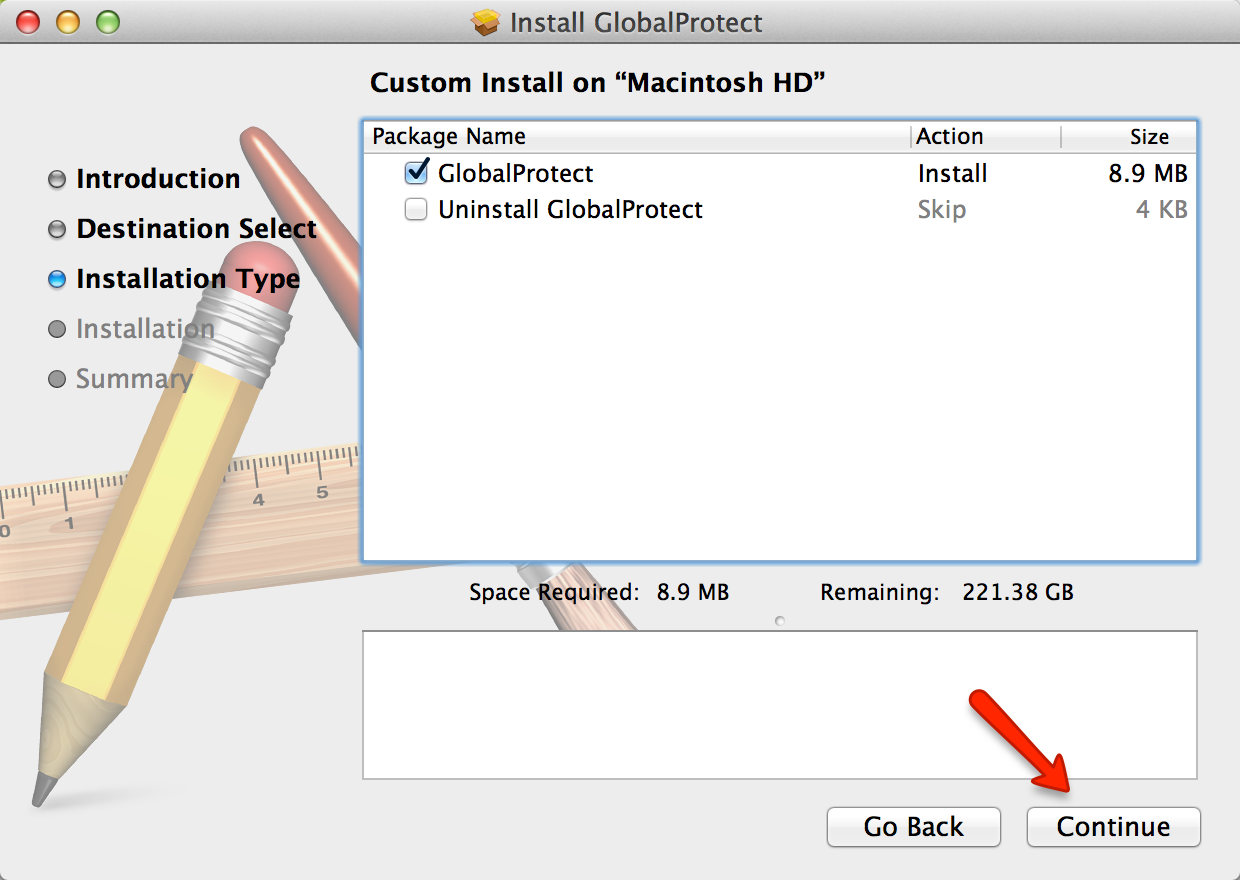
On the next screen, click “Install for all users of this computer” and click “Continue” twice.

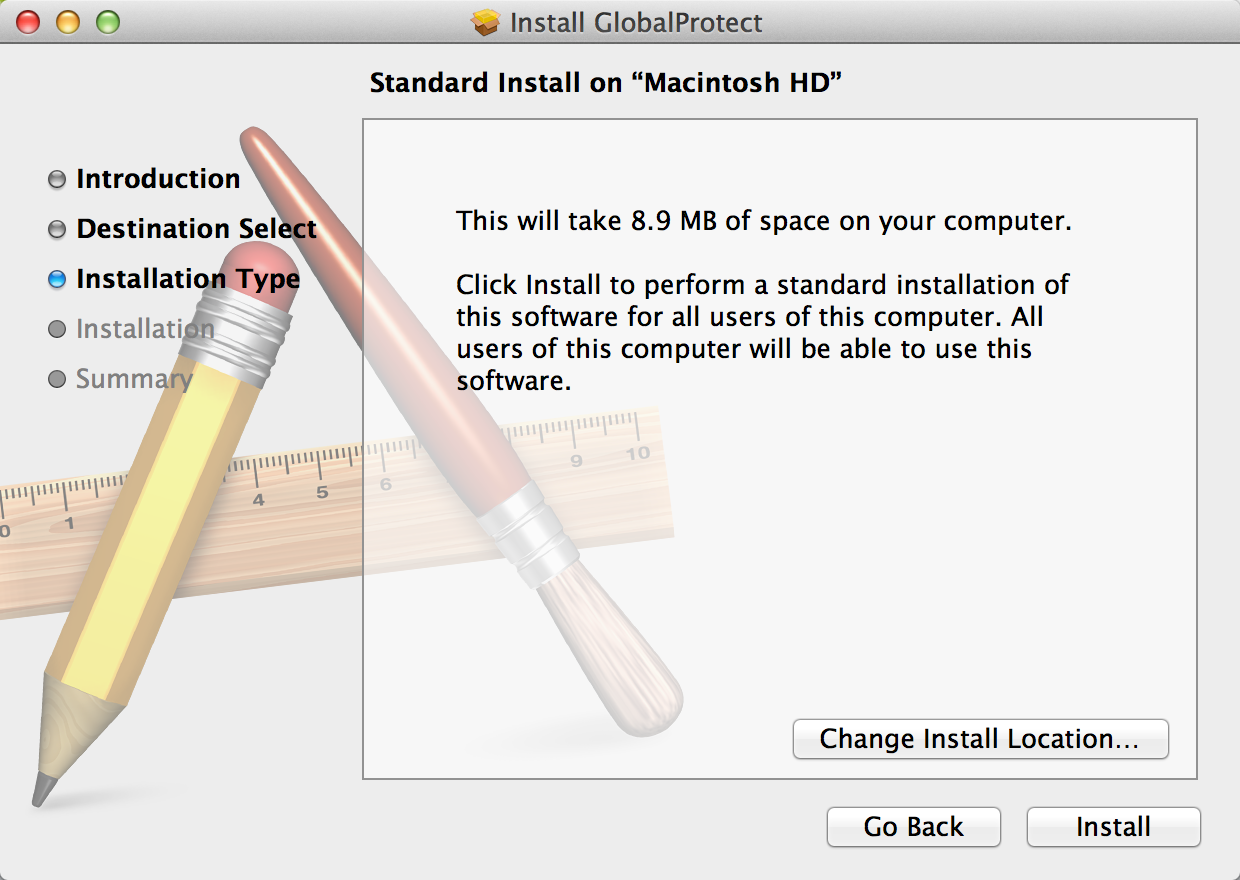
On the next screen, click “Install”
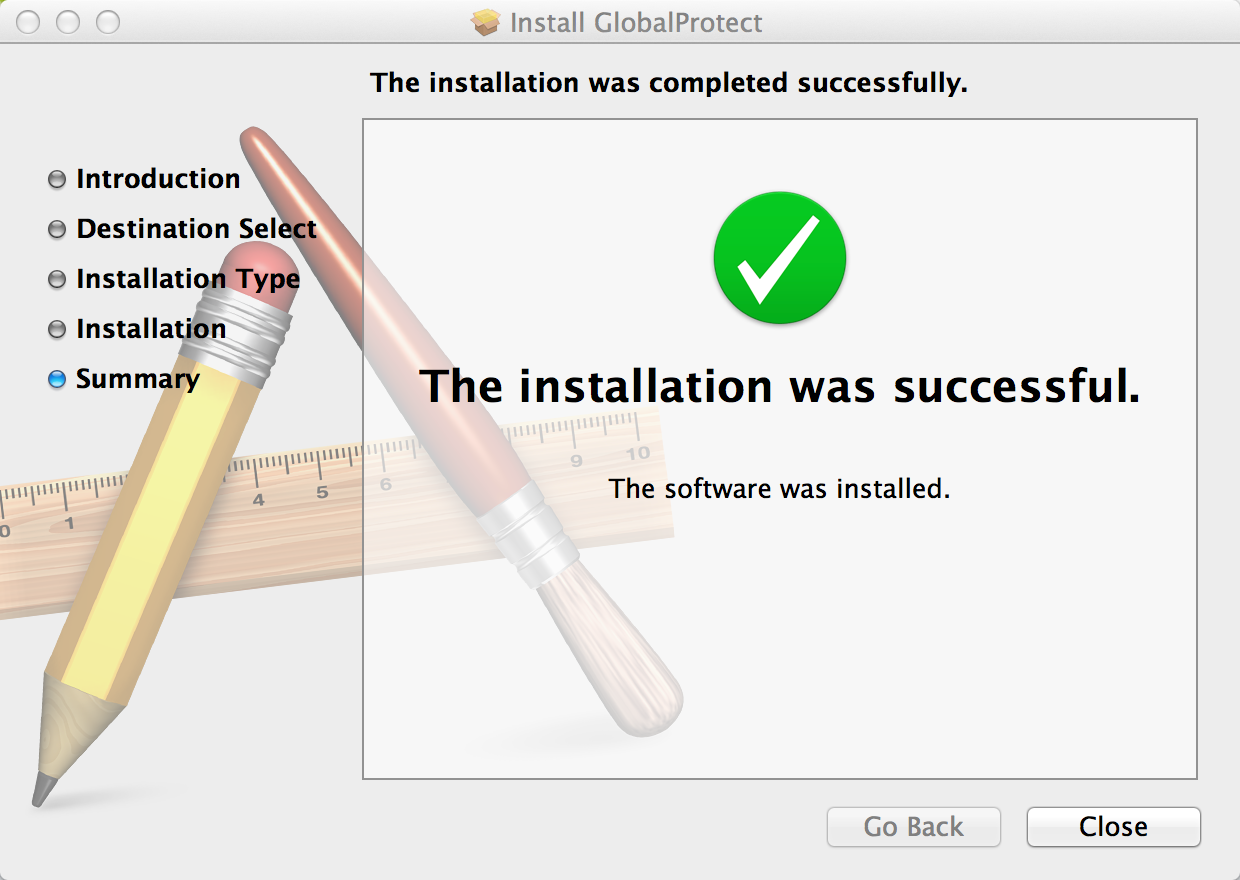
GlobalProtect will be installed on your computer. Close this window to move on.
Setting Up GlobalProtect
Launch Global Protect from Launchpad.

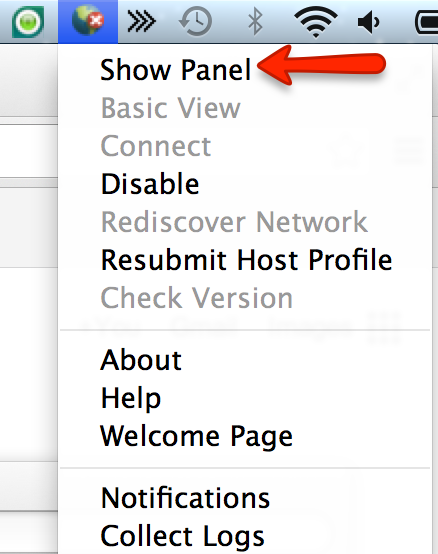
The settings menu should come up. If not, look for the icon in the top bar, click it, and click “Show Panel”.
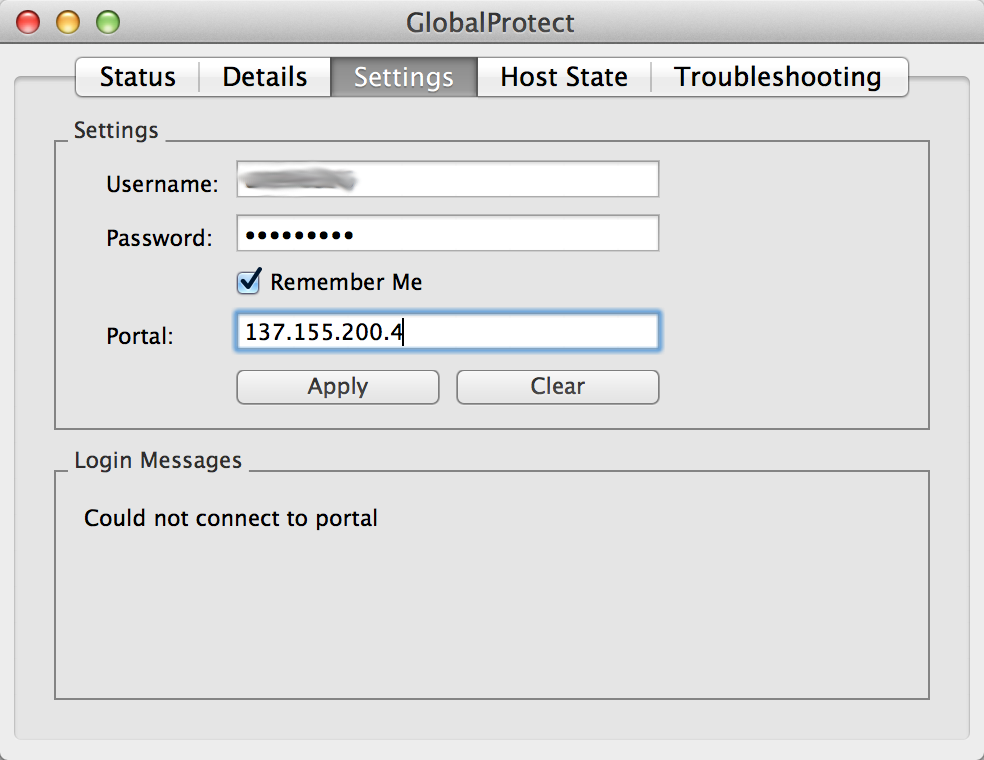
You’ll then see the control Panel. Enter your CNU username and password in the appropriate fields, and gpvpn.cnu.edu into the “Portal” field. Then click Apply.
The Global Protect icon will look like 
Install Microsoft Remote Desktop Client
Once you have the VPN software installed, you may need to install the Remote Desktop software on your computer.
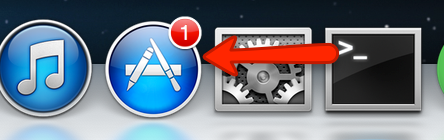
Click the “App Store” link on your computer.
In the search box, search for Microsoft Remote Desktop.

Click on Microsoft Remote Desktop.

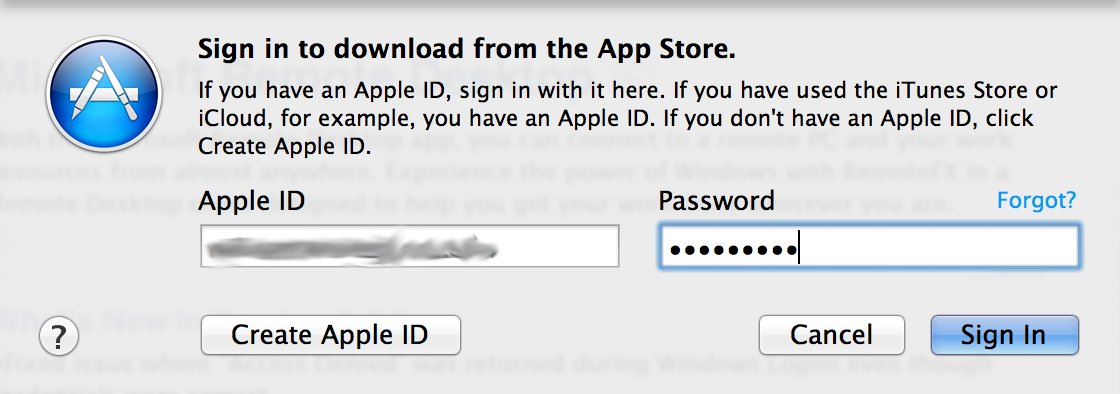
Click on the “Free” under the picture, then “Install App”.

Then enter your Apple ID and password into the box. The app will then install.
Setting up the Remote Desktop Client
To set up the connection, open Microsoft Remote Desktop

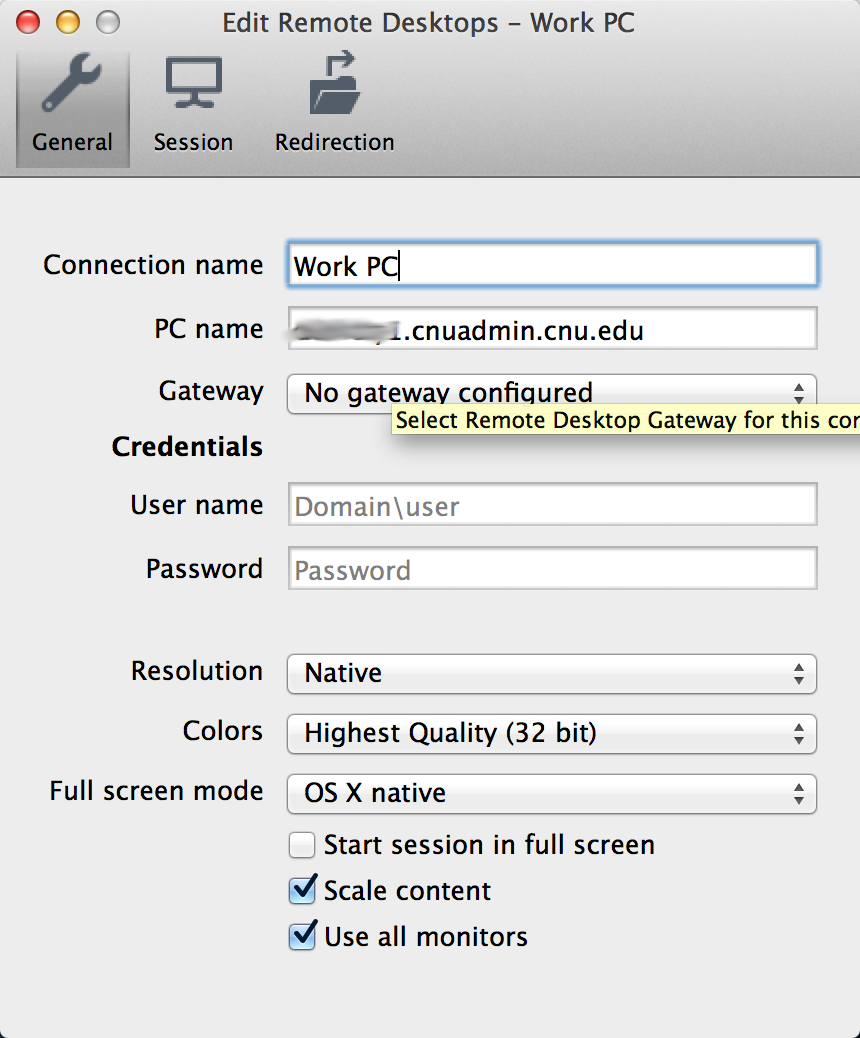
Then, click “New” to create a connection

On the screen that pops up, give the connection a name you can remember. Then enter the full name (including the .cnuadmin.cnu.edu. You can enter cnuadmin\ and your user name in the username box, but DO NOT enter the password. Also, uncheck “Start Session in full screen” and check the Scale Content box to make sure your content will fit on the screen. Then, close the window.
You are then ready to connect to your work computer.
Connecting to your Work Computer (from your Home Computer)
Click on the 

From Launchpad, click on “Microsoft Remote Desktop”
Click on the connection that you set up and click Start.

You will then be connected to your computer. You’ll need to sign in as normal.
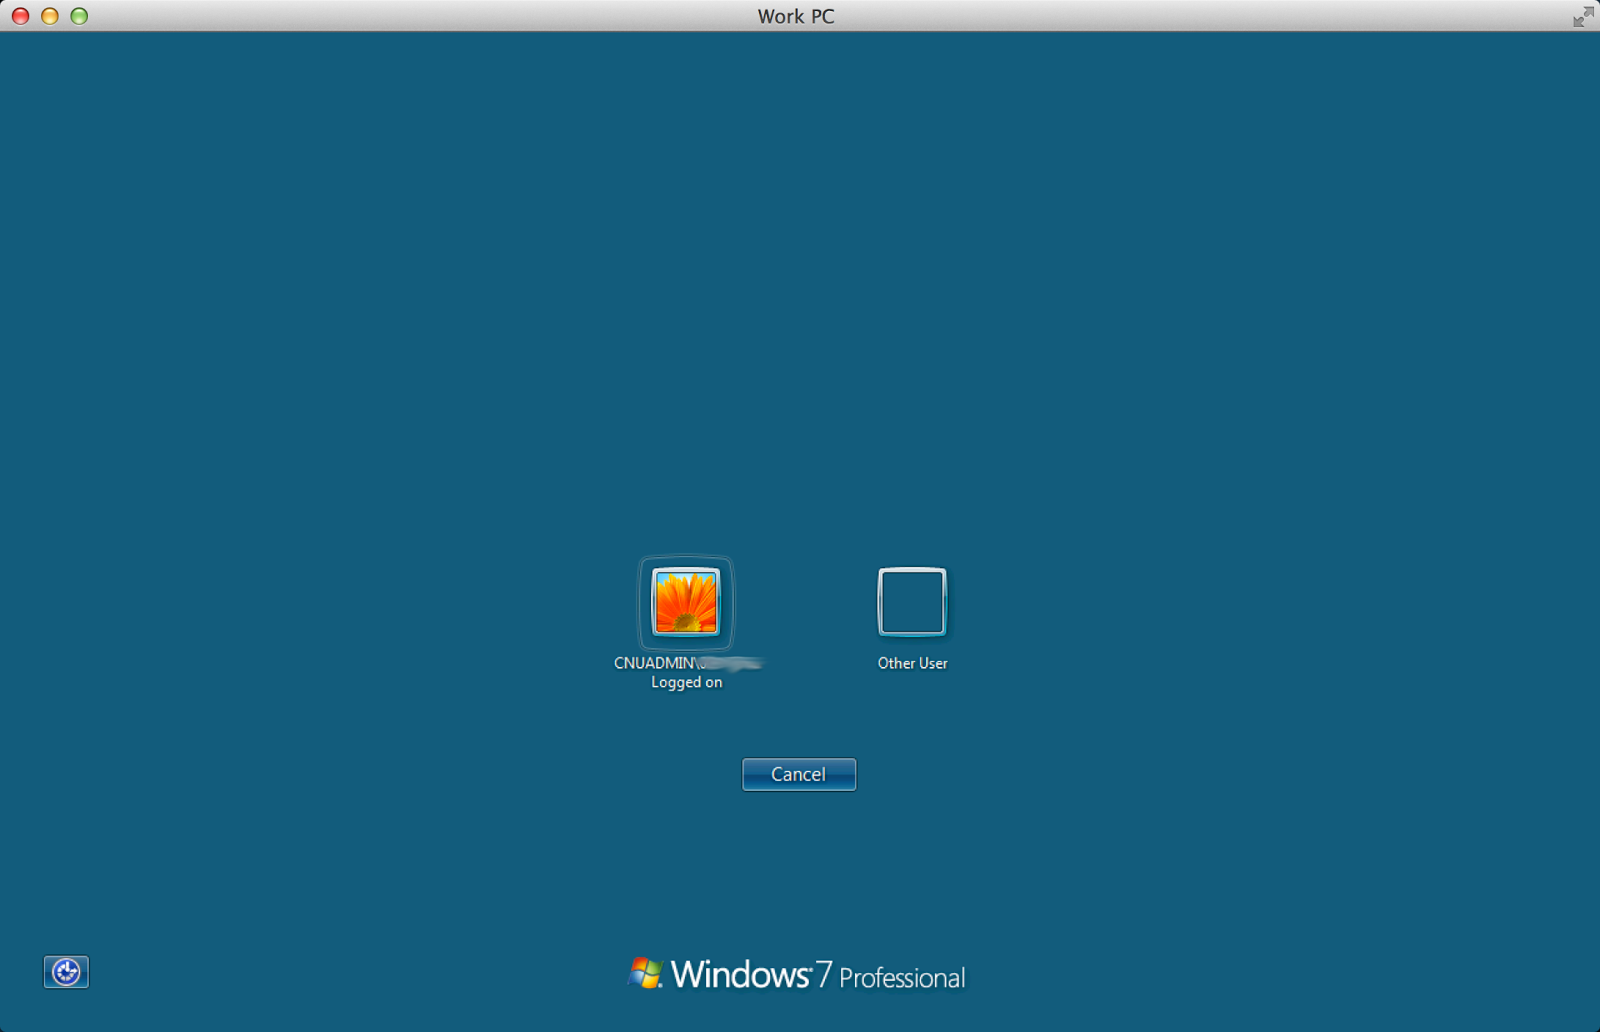
After signing in, you’ll be taken to your desktop as if you were sitting at your work computer.
To sign out, choose “Log Off” from the start menu in your remote window.
Then exit the remote desktop program.