Running a Session
To join a session, either click on the session name or Join Room. You’ll automatically be signed in with the name that you have in Scholar. If that name or title is incorrect, please contact the Registrar’s Office at 594-7155 and let them know your name is incorrect in BANNER (all of your information in Scholar is drawn directly from Banner, so Academic Technologies cannot reset it). You’ll then be taken into a session as a moderator.
Initial Setup
The first time you sign in to Collaborate, you’ll need to set up your webcam and microphone. If you want to screen-share, you’ll also have to install the relevant browser extension. This will only need to be done once on each computer/web browser that you use to access Collaborate. To do so, click the purple area with the arrow at the bottom-right of your screen.

This will bring up the Collaborate Panel. Click the gear icon on the panel to open the settings menu.

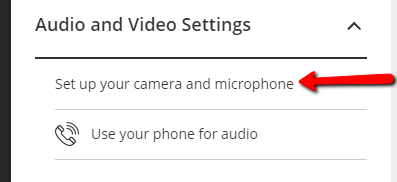
From there, click “Set up your camera and microphone”.
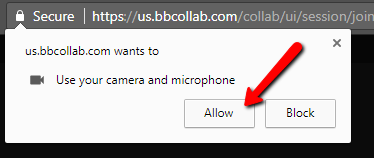
If you’re using Chrome or Firefox, a box will pop up asking whether you want to allow Collaborate to use your camera and microphone. Choose Yes or Allow.
You’ll then see the audio test. You can select the microphone to use with the drop down menu under the purple bar. If you see the purple bar moving, the microphone is picking up sound. Once you’ve got your microphone set properly, click “Yes - It’s working” to continue.

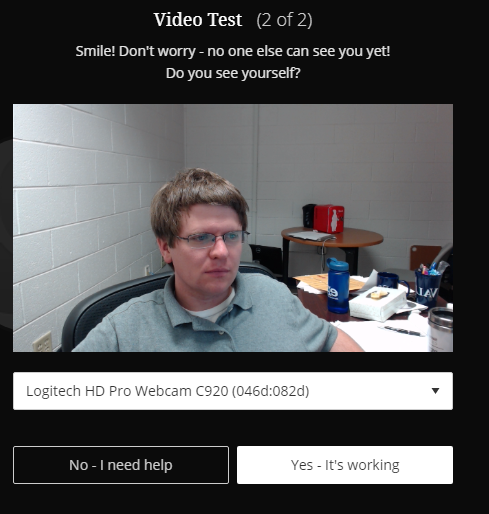
You’ll then be able to access your webcam. Choose the proper camera from the dropdown, and click “Yes - It’s working”.
Your camera and microphone will be set up and ready for you to use if/when you need them.
Basic Presenting
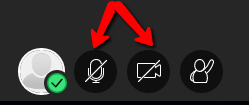
When you sign in to Collaborate, you start muted and with your video off. To turn your mic and/or video on, you can use the links at the bottom of the window.
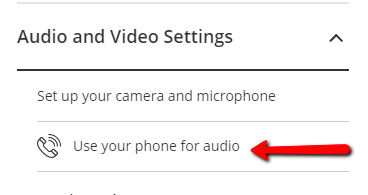
If you prefer to use your phone for audio, you can do so as well. Open the Collaborate Panel.

Then, click on the settings icon.

From there, click on Use Your Phone for Audio.
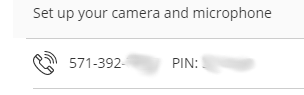
A phone number and PIN will appear so that you can call in.
You may also want to communicate with your attendees by chat. To do so, open the Collaborate Panel. Then, click on the chat icon.

You’ll see a chatbox. The main chat is accessible to everyone, and will be visible on the recordings.
Viewing Participants
On Chrome only, you can view all of the students in a course. Currently, only people with Moderator-level access (usually instructors), can view more than the last four people to speak, although Blackboard is working on adding more. Only one participant will show while sharing content, and only one participant will show on the recording.
By default, you'll see the speaker with a number of other participants underneath. To change the view, click the Change View button on the right side of your Collaborate window.

Once there, you can choose Gallery View to see up to 25 students at once.

While in Gallery View, you can see more or fewer students by clicking the magnifying glass buttons at the right side.

If you have more than 25 students, arrows will appear on the left and right side of the screen. Click on the arrows to page through your students. The person who is speaking will appear on all pages.
Sharing Files or your Screen
You can share files or your screen with participants. In addition, any participant with Presenter or Moderator access to the session can share files or screens as well (please note that only one person can share content at a time). Gallery View is currently not available while sharing content.
Files
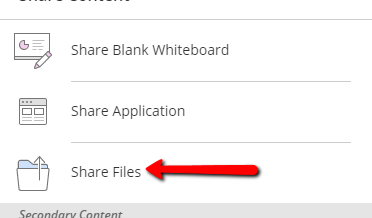
To share files, open the Collaborate Panel and click the share icon.

You can share PowerPoint, PDF or image files by clicking on the Share Files button.
Either drag and drop your file into the gray rectangle, or click it to open a file chooser.
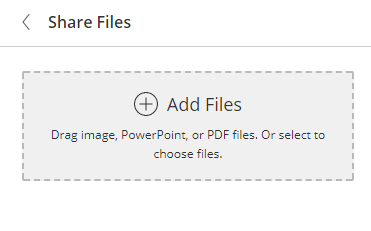
The file will upload and take a few seconds to convert into a format that Collaborate can show. Once it does, click it and then click Share Now.

You’ll then be asked to select a slide to start on. Click it, and your participants will begin viewing your PowerPoint.
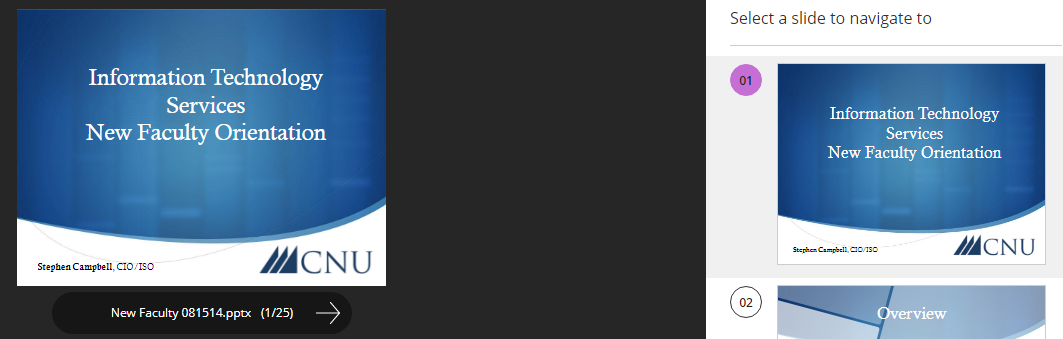
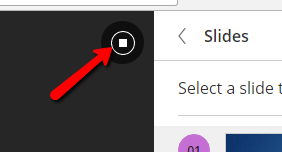
You can page through the PowerPoint with the arrows below it. When you’re done sharing it, click the stop button in the top right corner.
Applications/Entire Screen
To share an application or your entire screen, open the Collaborate Panel and go to the Share icon.
Then, click Share Application.
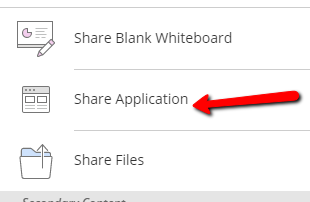
You’ll be asked whether to share a single application or your entire screen.

If you click entire screen, you’ll be asked which monitor you want to share (even if you only have one). What this looks like depends on your browser. Click the screen and choose Share.
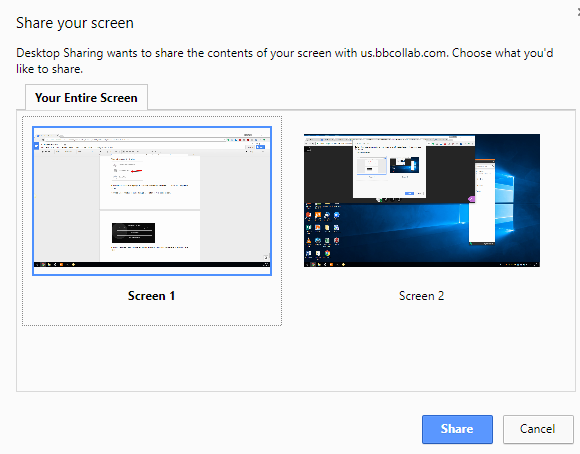
If you choose Application, a list of the windows you have open will come up (and may look different in different browsers). As with the entire screen, pick one and choose Share. Note that if you close this window, sharing ends.

Either way, your screen or application will be shared with the participants. To stop sharing, click the stop button in the top-right.
