...
If you're having trouble with the Print Anywhere client, you may find an answer to your question below. If not, please submit a Helpdesk ticket for further assistance.
...
| Panel |
|---|
| borderColor | #666666 |
|---|
| titleColor | #fff |
|---|
| borderWidth | 1 |
|---|
| titleBGColor | #0a2240 |
|---|
| borderStyle | solid |
|---|
| title | Documents are printing double-sided instead of single-sided |
|---|
|
| Section |
|---|
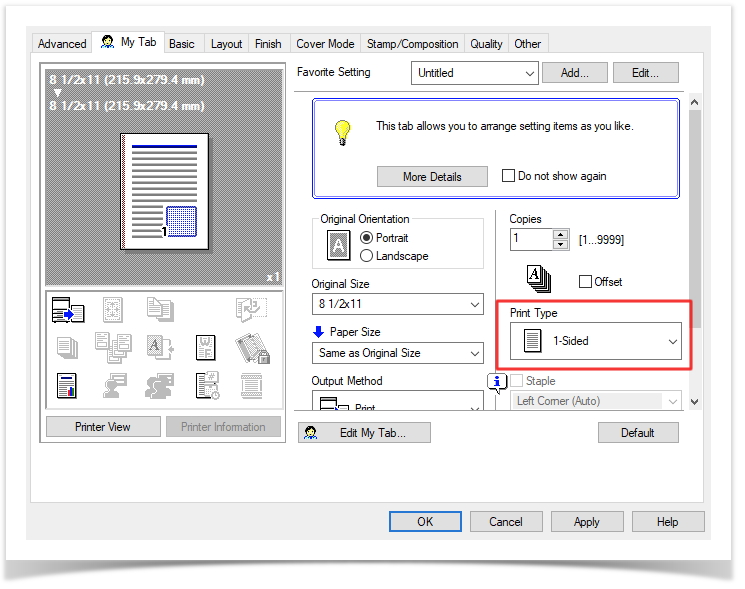
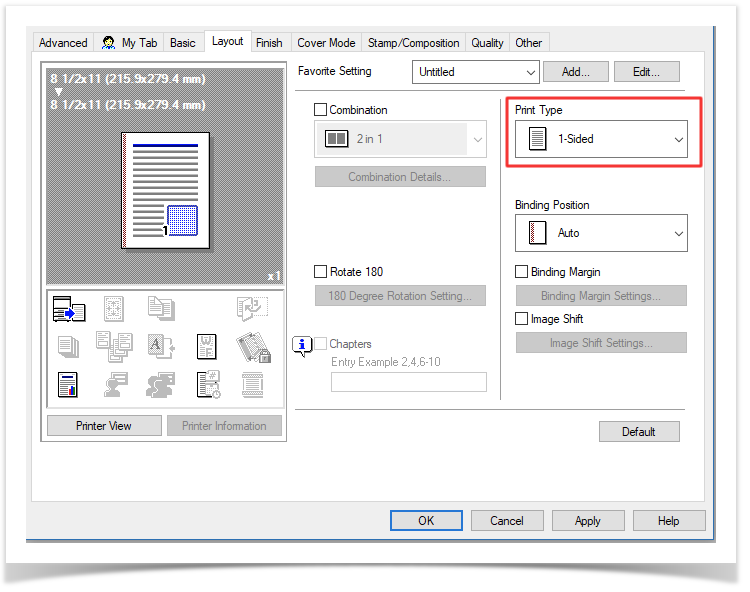
WindowsWhen going to print, select the printer and click the Preferences button. Make sure the following two options are set to "1-sided".  Image Modified Image Modified Image Modified Image Modified
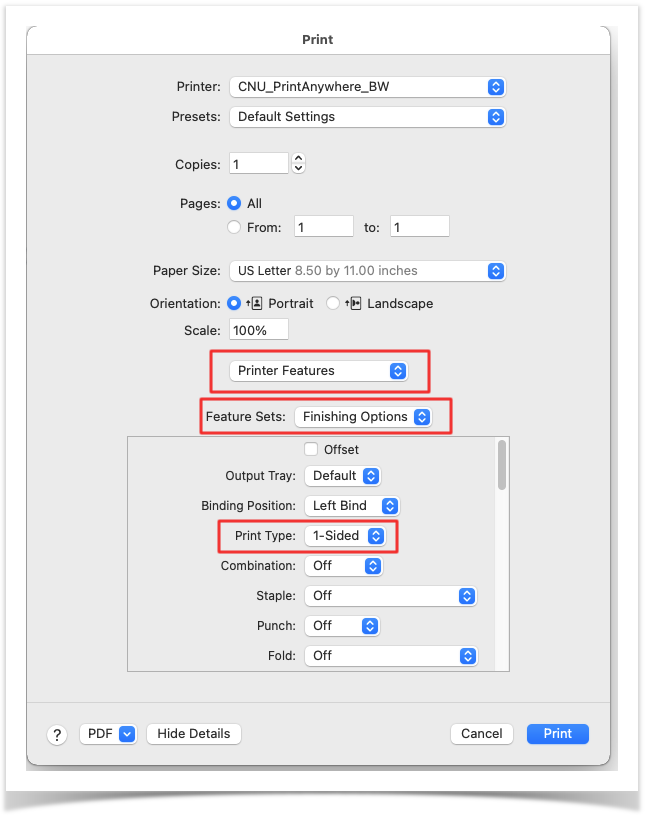
macOS 11.x and LaterWhen printing, change the drop-down to "Printer Features". Then select "Finishing Options" from the Feature Sets drop-down, and make sure the Print Type is set to "1-Sided".  Image Modified Image Modified
| Note |
|---|
If you do not see the "Printer Features" option, you may not have the correct Konica Minolta driver package installed.macOS 10.x and Earlier
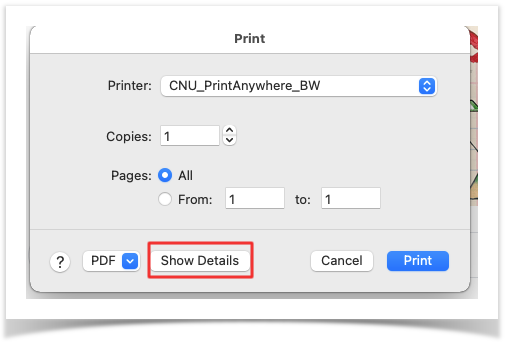
When going to print, click the "Show Details" button.
 Image Modified Image Modified
After that, select "Printer Features", then "Finishing Options", and make sure the Print Type is set to "1-Sided".  Image Modified Image Modified
|
|
| Panel |
|---|
| borderColor | #666666 |
|---|
| titleColor | #fff |
|---|
| borderWidth | 1 |
|---|
| titleBGColor | #0a2240 |
|---|
| borderStyle | solid |
|---|
| title | Unable to find the port:PharosPopupPort |
|---|
|
The Windows installer leaves a "ControllerLog.txt" file in the user's %temp% folder. In addition to receiving an error message during installation, the following entry may appear in this log file. | Code Block |
|---|
| language | text |
|---|
| theme | RDark |
|---|
| title | Sample ControllerLog.txt Contents |
|---|
| [2018/09/17 18:07:10.121 P8DF0 T7E0C Controller] [CRunInstructions::DoStep] A PSException was caught: "Unable to find the port:PharosPopupPort" |
To resolve this issue, you'll need to completely uninstall the client, following the Windows Client Cleanup process, and specifically delete the following registry key: "HKEY_LOCAL_MACHINE\SYSTEM\CurrentControlSet\Control\Print\Monitors\Pharos Systems Popup Port Monitor" |
...
| Panel |
|---|
| borderColor | #666666 |
|---|
| titleColor | #fff |
|---|
| borderWidth | 1 |
|---|
| titleBGColor | #0a2240 |
|---|
| borderStyle | solid |
|---|
| title | macOS Client Cleanup |
|---|
|
| Anchor |
|---|
| macos-cleanup |
|---|
| macos-cleanup |
|---|
|
In the event of a failed installation on macOS, the following steps should be taken prior to attempting a re-installation of the client.
- Start out by running the Pharos uninstaller, to give the program a chance to clean up as much configuration as possible in a normal manner.
- In Finder, use the "Go" menu, select "Computer", and then double-click the local hard drive.
- Under the “Library” folder, go to “Application Support,” and then “Pharos.”
- In the “Utilities” folder there, run the Uninstaller application.
- When prompted, tick the box next to “Pharos Popup” and press the Continue button twice, followed by the Done button to fully remove the application.
- Open System Preferences and check under Printers & Scanners to see that all of the "CNU_PrintAnywhere" queues have been removed. If any remain, remove them manually.
- Delete all of the Konica Minolta drivers
- In Finder, use the "Go" menu, select "Computer", and then double-click the local hard drive.
- Browse to the Library > Printers folder and delete the "KONICAMINOLTA" folder there.
- Browse to the Library > Printers > PPDs > Contents > Resources folder and delete all "gz" and "ppd" files that start with "KONICAMINOLTA" or "Konica-Minolta" or are named "KOC650iU.ppd".
- Restart the computer.
- Re-try the installation.
|
...
| Panel |
|---|
| borderColor | #666666 |
|---|
| titleColor | #fff |
|---|
| borderWidth | 1 |
|---|
| titleBGColor | #0a2240 |
|---|
| borderStyle | solid |
|---|
| title | Installer Log File Locations |
|---|
|
| Section |
|---|
Windows- The Windows installer leaves a "ControllerLog.txt" file in the user's %temp% folder. This file is available during and after installation.
macOS
While the installer is running (typically after the error occurs, but before the installer window is closed), go to the Window menu and select "Installer Log".  Image Modified Image Modified
Change the Detail Level drop-down (top left) to "Show All Logs".
 Image Modified Image Modified
Use the Save button (top right) to save the log file to a viewable location. |
|
...


