| Page properties | ||||
|---|---|---|---|---|
| ||||
|
...
|
...
|
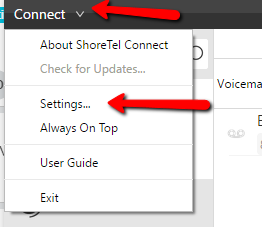
The Mitel (formerly known as ShoreTel) client allows you to change forwarding, voicemail, and several other settings without going through on-phone or voice-driven menus. This article details how. If you need information on obtaining the client or its basic functionality, you can use our Mitel Basics article. To set up your voicemail, see the
...
Changing Voicemail Settings with the Mitel Client Article.
...
Table of Contents
| Table of Contents | ||
|---|---|---|
|
Introduction
The procedures below explain the process for setting up a "Power Routing" rule that will forward calls to another line when your phone's availability state is set to "Out of Office". This process requires the use of the MITEL Connect Client, if you do not have the MITEL Connect client installed on your computer please follow this link for instructions on how to install the client - Link.
Procedures for setting up call forwarding
| UI Steps | ||
|---|---|---|
|
...
|

Setting Up Call Forwarding
You can set up call forwarding on a per-state basis using the Call Routing menu. For more information about states, see our article on Call Forwarding with States
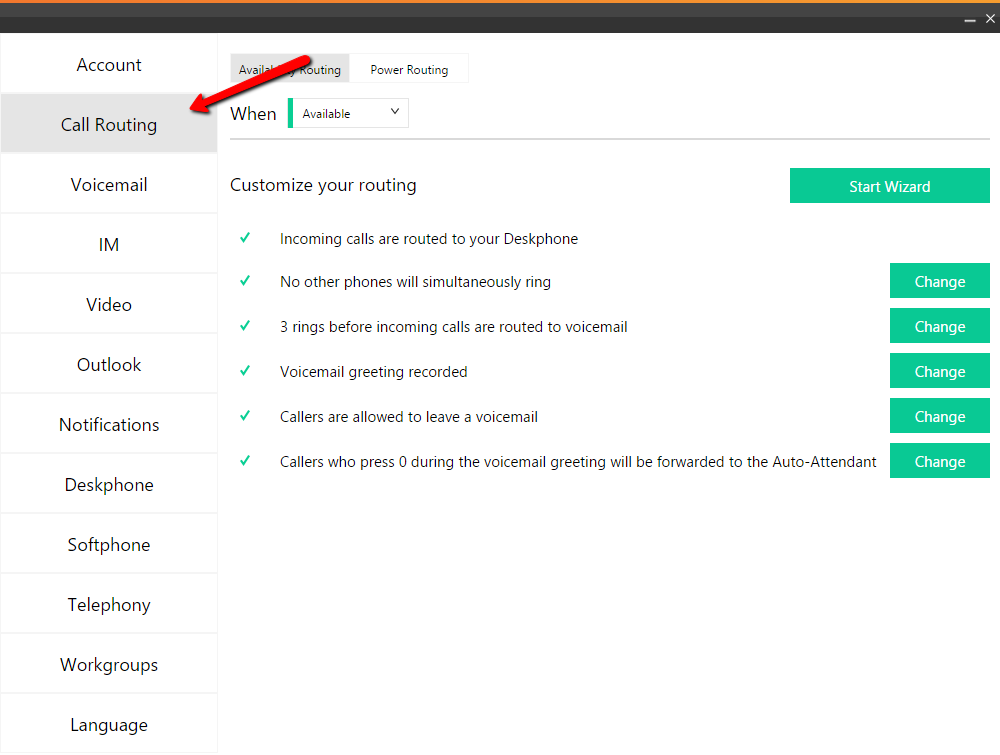
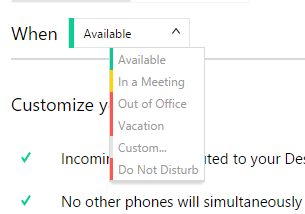
First, select the state for which you’d like to edit the forwarding information.
You’re then given a number of options for forwarding your calls.
Traditional Call Forwarding
To access the same call forwarding options available on your phone, click on the Change button next to either “[#] rings before incoming calls are routed to voicemail” or “Incoming Calls are immediately routed to voicemail”


Once you click on the change button, you get a screen with three options.
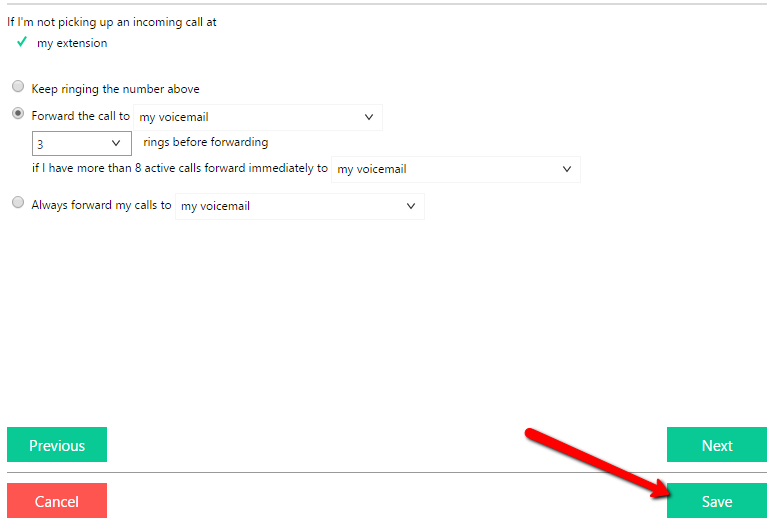
Keep ringing the number above disables all forwarding; your phone will ring until you pick it up or the caller hands up.
Forward the call to allows you to forward the call to your voicemail or another number after a given number of rings. You can change the number of rings or the forwarding destination with the dropdown menus.
Always forward my calls to will immediately forward any calls received by your phone either to your voicemail or another number; your phone won’t ring. You can change the destination using the dropdown menu.
When you’re done, click Save.
Simultaneous Ringing
You may also want calls to your phone to cause both your phone and another phone (such as your mobile phone) to ring. To do so, select the state in which you’d like this to happen and click next to “No phones will simultaneously ring” or “This phone will simultaneously ring [number]”.
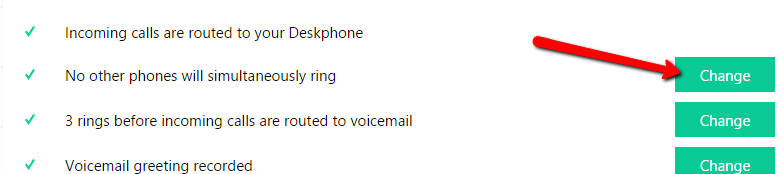
Check the box next to “Also simultaneously ring the following” and click the dropdown to select a number. Enter the number exactly how you’d dial it.
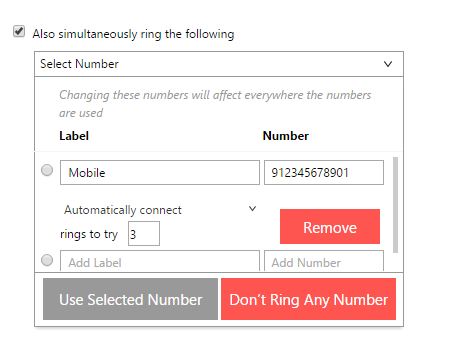
Click Use Selected Number, and then click Save.
Find Me
If your phone is in any state other than Available, you’re also able to set your phone to ring a different number if people press 1 during your voicemail greeting. To do so, click the button next to “If callers press 1 during my voicemail greeting...”
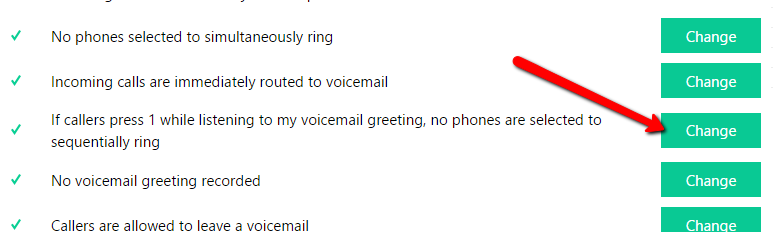
On that screen you can set numbers using the dropdown that will be called if people press 1 during your voicemail greeting.
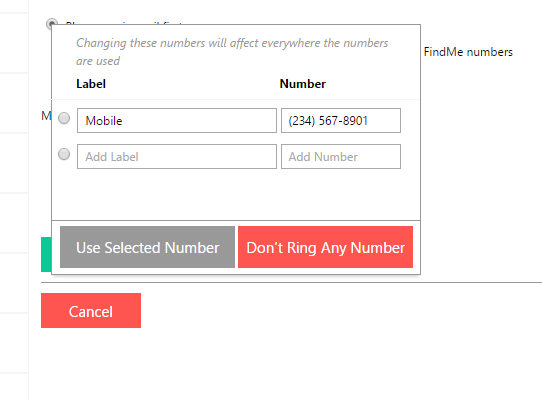
There are a couple of things that you should note when using Find Me:
The person receiving the call will not immediately be connected to the call. Instead they will receive an automated message asking them to accept the call
|


...