This document discusses the deployment of stored tests in Scholar's Original course view. For documentation on tests within an Ultra course, refer to our Scholar Ultra Courses hub here.
When tests and quizzes are built they are stored in the Tests area. Indeed, you can build tests from the interface in that area rather than a content area.
Select the Tests, Surveys and Pools tool from the Control Panel.

This page provides links to pages that show you the various tests, question pools, and surveys available in the course. Click ‘Tests’ to see that area. Note that any recently built test that has not been made available to students or put in a content area will have a 'no' in the deployed column. From this page you can import and build tests.

To put a test to use, it must be deployed into a content area. Select the content area you intend to use from your course menu.

In that content area, use the 'Assessments' menu. Select test.

On the ensuing page you have the option of creating a test or selecting a test. To select a test highlight the test in the panel next to 'Add an Existing Test'.
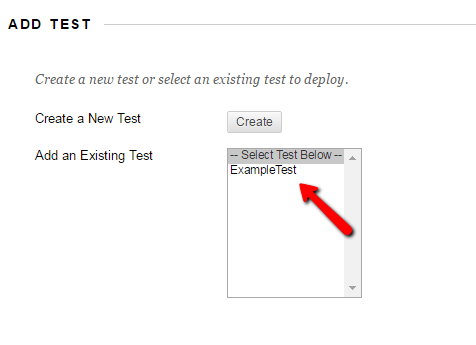
Click submit.

You will now be on the 'test options' page. There are a number of factors to control about your test deployment here. The second section has to do with student availability.
You should select 'yes' next to 'Make the Link Available' unless you plan to return to this screen and manually allow the students to take the test. You can also choose whether to have Scholar announce the existence of the new test.

If you want to give students multiple tries at the test, you can select that next. You can also choose which of the attempts counts as the official grade for the test.

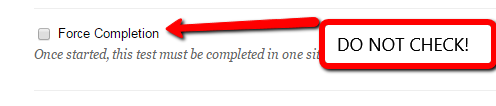
We strongly recommend against checking Force Completion! If the student is disconnected from the test for even a few seconds, the test will be automatically submitted. Then, you will have to manually clear out the student’s attempt and they will have to completely start over. Additionally, this DOES NOT prevent the student from accessing other browser tabs while the test is running, as long as they aren’t disconnected from Scholar.
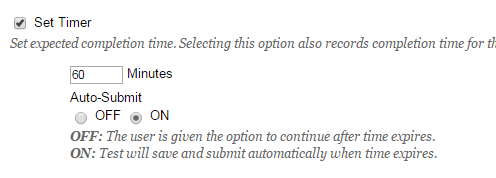
You may time the test by checking the box for ‘Set Timer’. Enter the time limit (in minutes) in the provided box. This timer runs whether or not the student is in the test, so is a far better alternative to Force Completion above. Select ‘ON’ under ‘Auto-Submit’ if you want the time limit to be enforced automatically. This will cause the test to submit as soon as the time is expired.
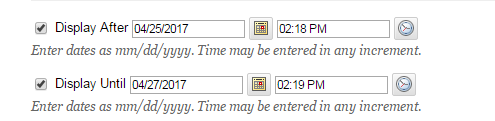
If you intend for the test to be available during a specific time period you should check the boxes by 'Display After' and 'Display Until' and put in the corresponding dates and times. You must still have 'Yes' selected next to 'Make the Link Available' or the link will not appear during that window of time.
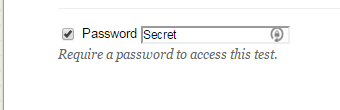
If your students are taking the test in class, it may be easier for you to set a password that they must enter before they can start the test. You can do that with the Password field. If you have multiple sections merged into one, make sure to change it once each sections’ students sign in to the test.
Additional test settings should be filled in on this page. The Test Availability Exceptions section allows you to exempt one or more students from the availability rules you set up. See the article on Test Availability Exceptions for more details.
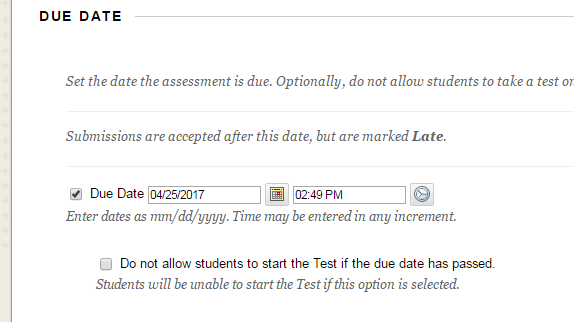
The ‘Due Date’ option is a function that works with notification settings. If you enter a due date then students will get reminders about the upcoming test (depending on their own settings and preferences). We recommend against checking the “Do not allow students to start the test if the due date has passed” box, as it will interfere with any Test Availability Exceptions that you create.
The next section contains two checkboxes. First, you can choose whether to include the test in the calculations for the Grade Center. Unless you have a compelling reason to do otherwise, you should check this box.

Next, you’ll see an option to hide the results from yourself and the grade center. If you check this box, you will NEVER be able to see the results. Unless this is a pre-test that you don’t want to see, leave this box unchecked.

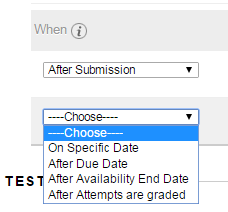
The “Show Test Results and Feedback to Students” section allows you to control what sort of information students see after completing their tests, and when they see it. You can use the two rows in the section to show different feedback to students at different times.

On the left side, you can choose when the students see the feedback. Don’t use “After All Attempts are Graded”, as a bug in Scholar will prevent students from ever seeing the feedback.
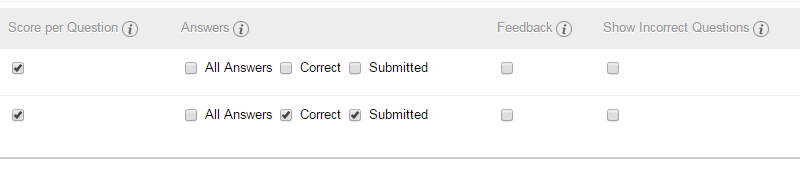
Then select the types of feedback that you’d like the student to see at that time. You have several choices:
- Score per Question: how many points a student earned for a particular question
- Answers:
- All Answers: All potential answers for a multiple-choice question
- Correct: The correct answer for the question
- Submitted: The student’s answer for the question
- Feedback: Any feedback that you or the test bank publisher added to the questions
- Show Incorrect Questions: Displays a list of the questions that the student got wrong
It’s a good idea to display both the correct and submitted answers if you display either, otherwise students can be confused about what exactly they are seeing.
The Test Presentation section allows you to choose how the test is presented to the student.
All at once means that all questions are a single web page, one at a time means the students see each question as a single page, one after the other. Check “Prohibit Backtracking” to prevent students from going back in the test and reviewing their answers. Unless you have a compelling reason to use it (e.g. this is practice for a certification that prohibits backtracking), it should be avoided as it can occasionally have bugs.

Randomize changes the order of questions for each student. If all of your questions are independent, this is fine to use. However, if you have questions that refer to earlier questions, you should not use this setting.
When you have completed the test options page click submit. You should get a success message in a green bar at the top of your page. Now the test will appear for students at the time you have designated, in the content area you chose.