Creating Scholar Tests in Excel
A quick way to create simple tests in Scholar is to type the questions into a spreadsheet and import them into a test in Scholar. To do so, open up Excel, and create a new sheet.
DO NOT create any sort of header row; it will not be processed. Instead, use one line for each question in the test. The first cell in each line should be a code representing what type of question it is. Subsequent cells will vary based on the type of question. It is very important that you don’t skip a cell or copy and paste anything with line breaks into a cell. Doing so will cause your questions not to import correctly. The following table gives the format for the most popular question types. Each number is a column
Question Type | Code | Format |
Essay | ESS |
|
Fill in the Blank | FIB |
|
Matching | MAT |
Repeat #3 and #4 for multiple items to match. There must be a one-to-one relationship for matched items to work |
Multiple Answer | MA |
Repeat #3 and #4 for multiple choices |
Multiple choice | MC |
Repeat #3 and #4 for multiple choices |
Numeric Response | NUM |
|
Ordering | ORD |
|
True/False | TF |
|
Once you’ve completed all of the questions, it’s important to check your spreadsheet for the two most common types of errors: blank cells and inadvertently-included line breaks.
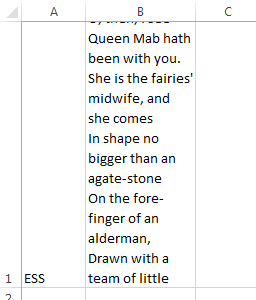
A blank cell may be covered with the question text:

If your column widths are small, line breaks may not be immediately obvious, as they will be mixed in with wrapped lines:
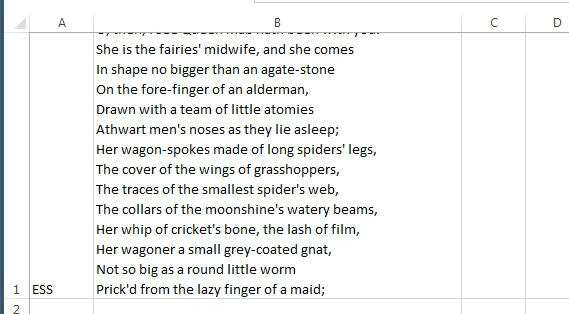
However, expanding the width of the column should make them stand out
When you’ve completed your checks, you should save the file as a tab-delimited text file.
To do so on Office 2016, click the File menu, and choose Save As. Then, click either the folder to which you’d like to save the file or Browse to select a new one.
In the window that pops up, change the value in “Save as type:” to “Text (Tab-delimited)” and save the file.
Once you’ve saved the file, create a test in Scholar as normal. When you get to the Test Canvas, click on Upload Questions.

On the next screen, click Browse to select a file, and enter the number of points per question.

Click Submit, and your questions will be imported. You will be notified of any detected errors in the file.